
One afternoon my wife and daughter were going to see the latest twilight movie and asked if I wanted to go. I politely declined. So after they had left to head to the theater I was getting a little bored so I decided to build a solar dehydrator and drink beer.
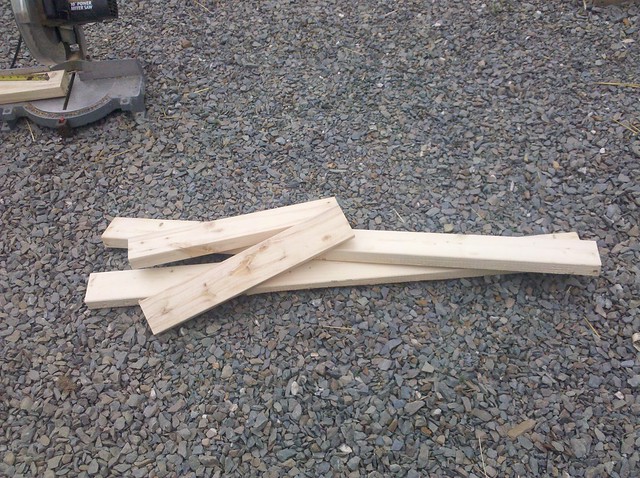
I went down to the hardware store and picked up some materials

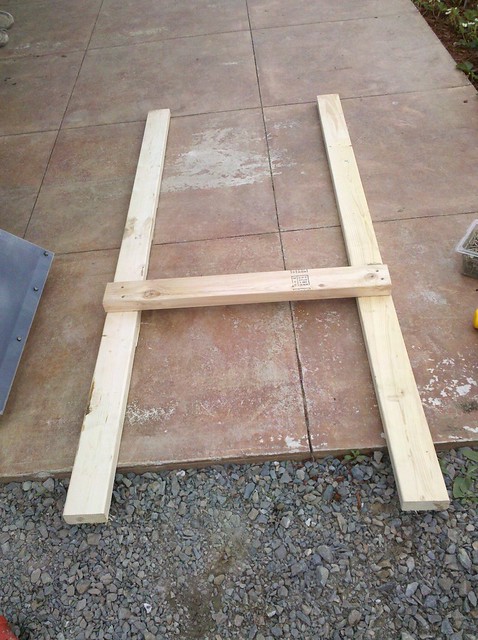
I cut some 2×4’s down to 2 and 4 foot pieces
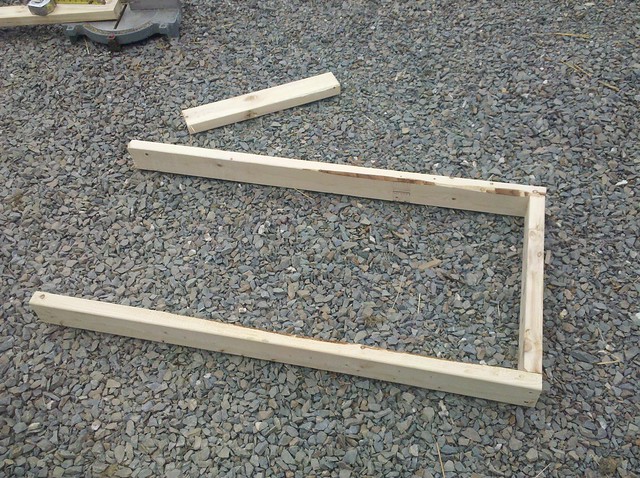
and screwed them together to form a framework
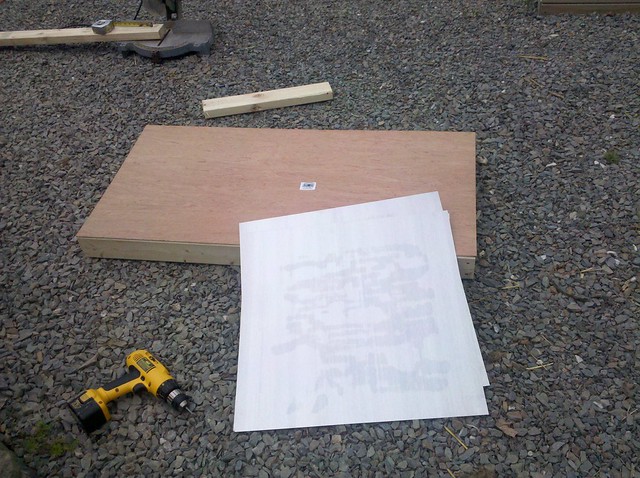
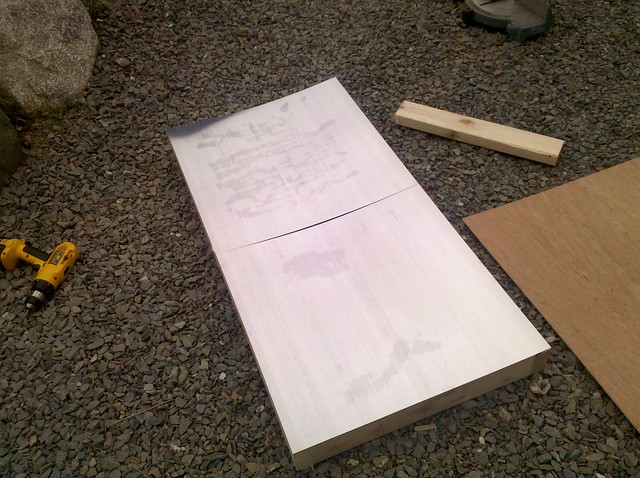
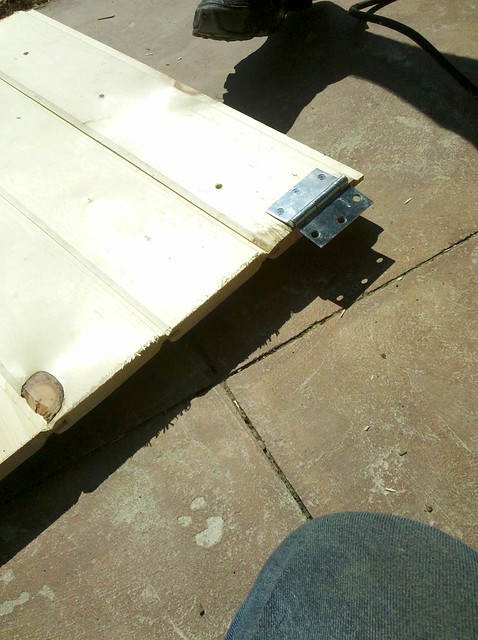
I had picked up some 2×2 sheets of aluminum and 2×4 sheets of luan. I test fitted the luan onto my frame
and screwed the aluminum onto the frame
I backed it with the piece of luan

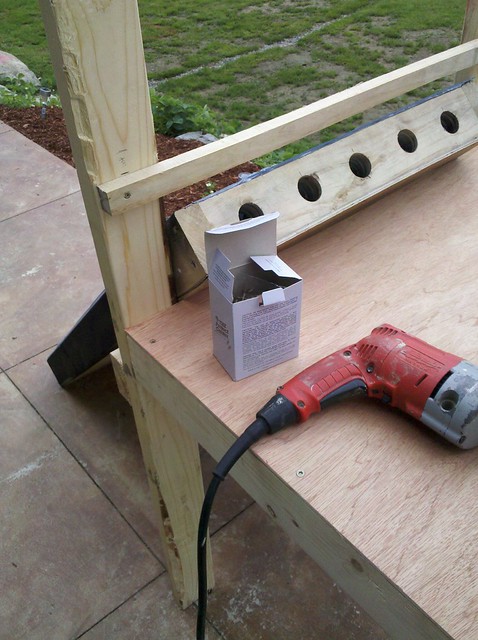
I grabbed my 1 inch wood bit and drilled out vent holes in the top and bottom of the frame

I spray painted the whole thing flat black
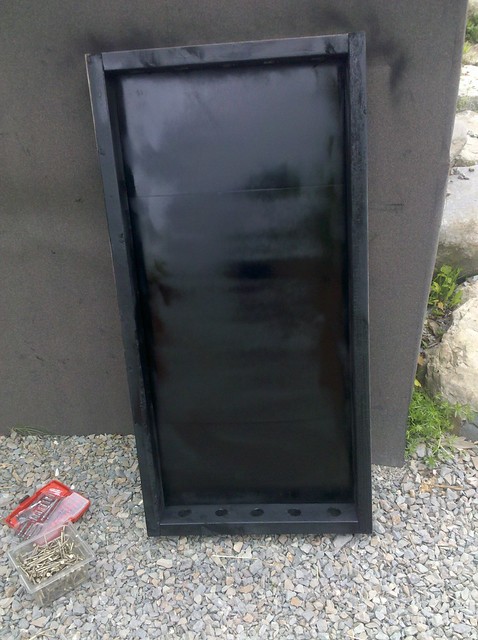
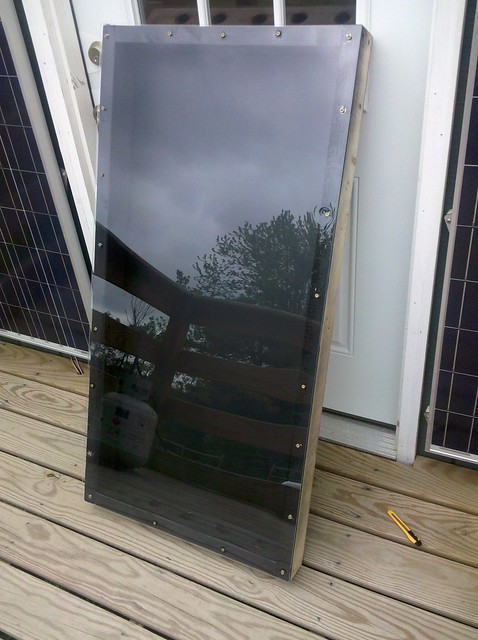
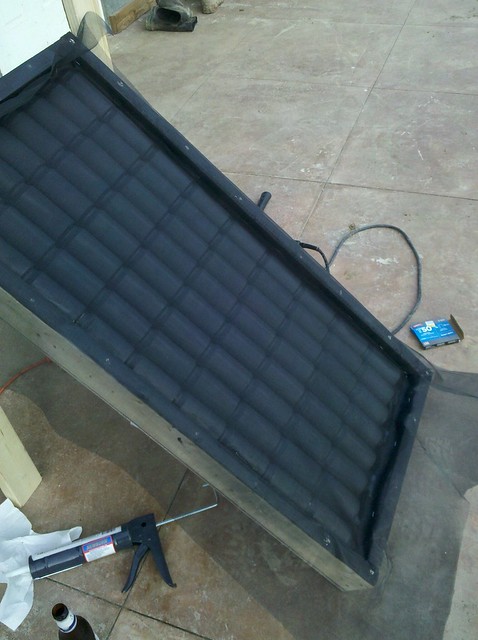
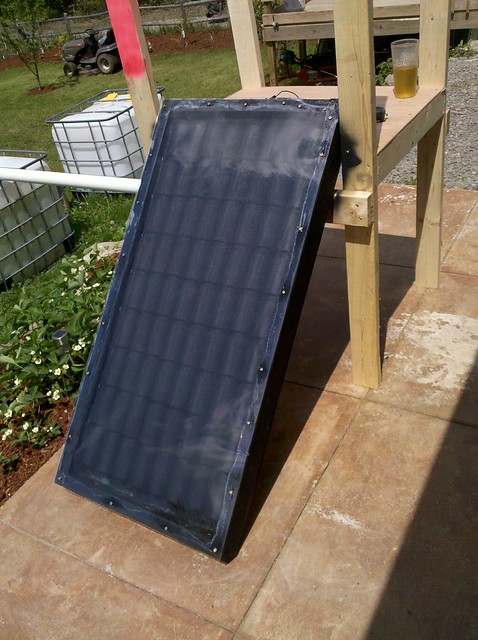
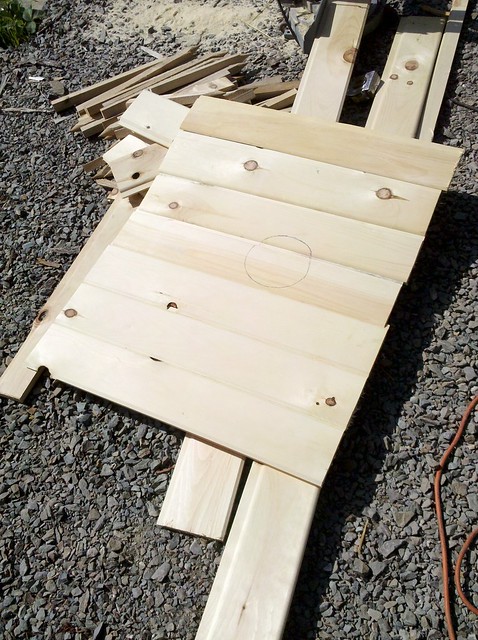
I had picked up a 2×4 sheet of lexan. I laid it on top of the frame and pre-drilled mounting holes
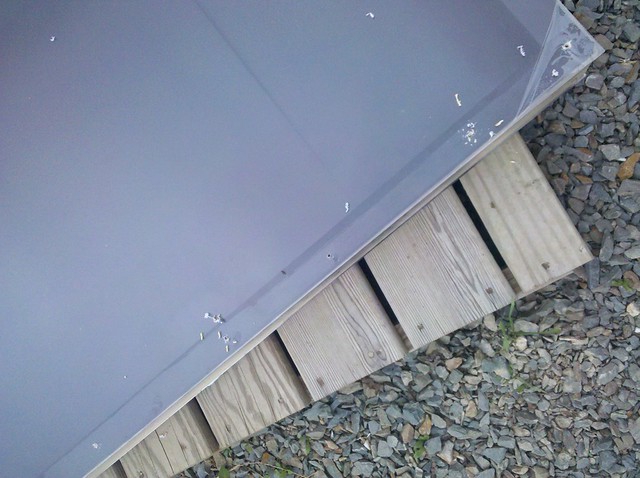
and screwed it down to the frame
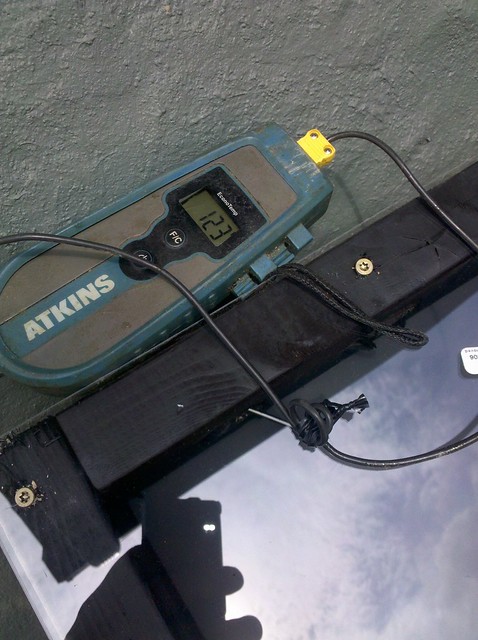
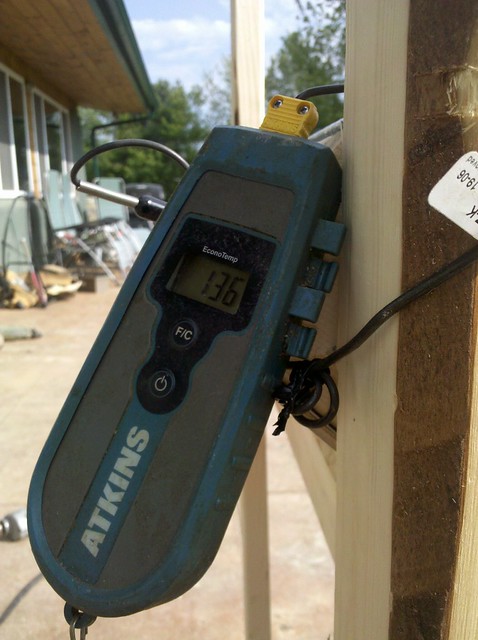
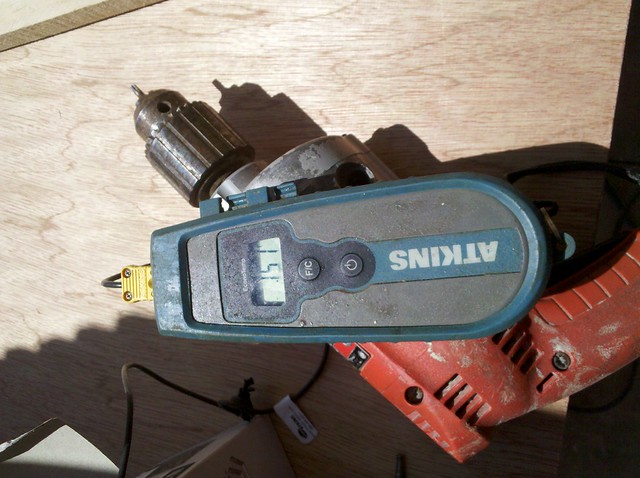
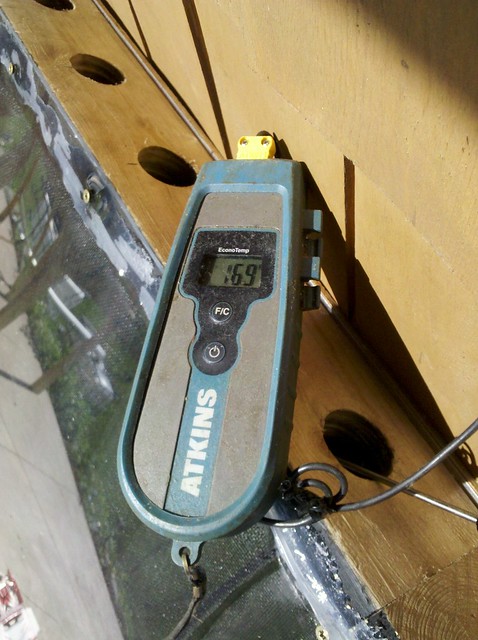
I set up my thermocouple to check the temp and it was climbing
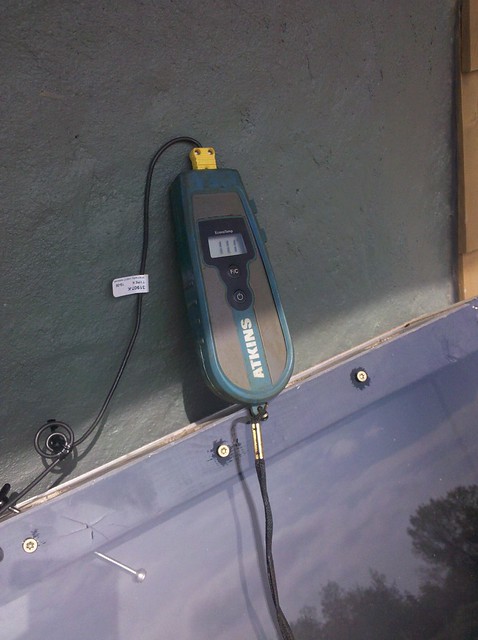
I let it sit in the sun a little longer to see what I could get the temp to
and was able to get it to 123 after about 15 minutes
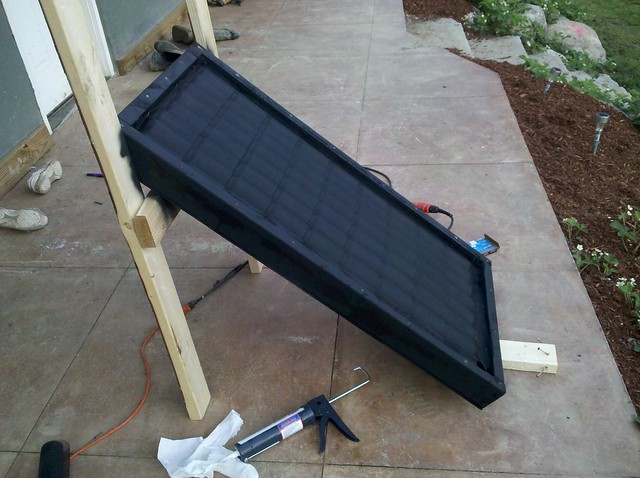
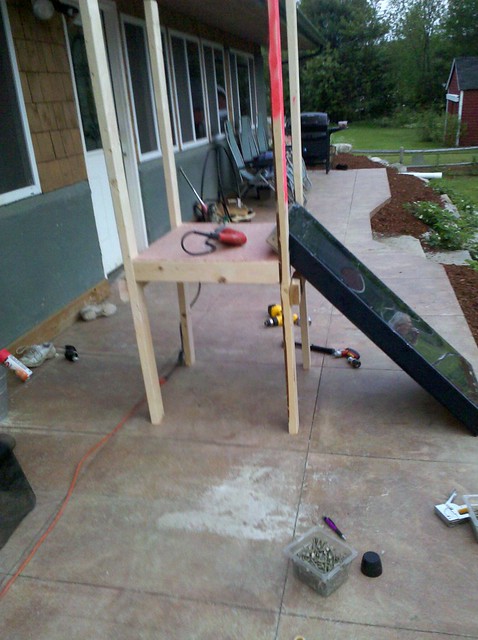
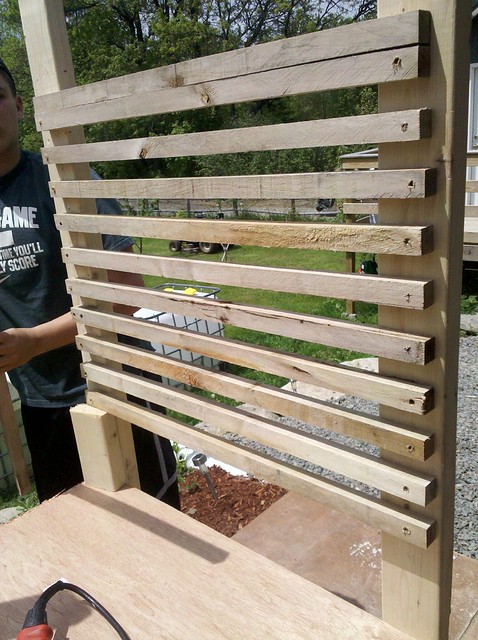
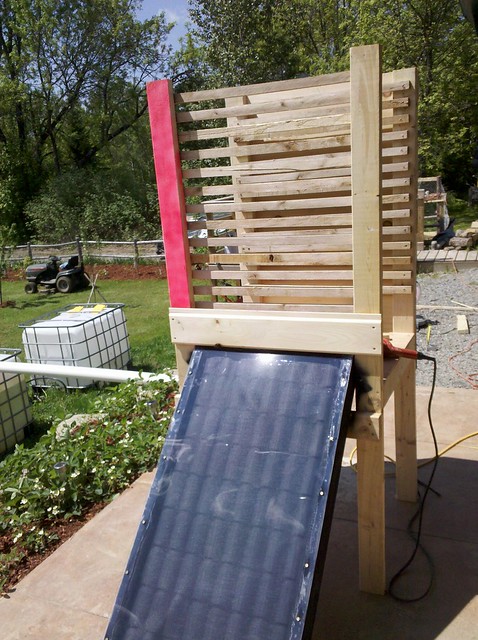
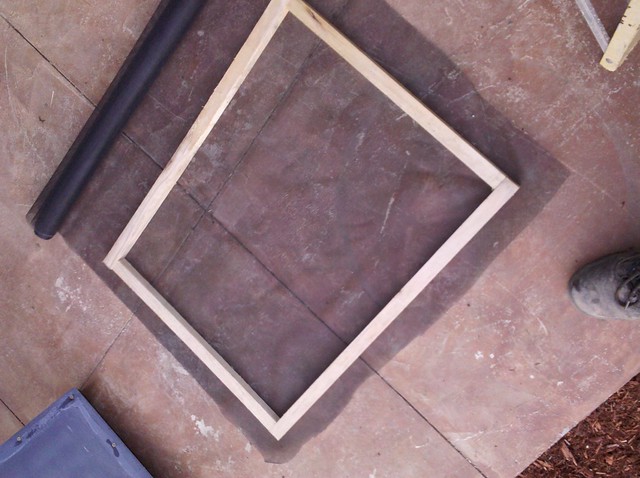
I grabbed some more 2×4’s to make the frame for the dehydrating chamber
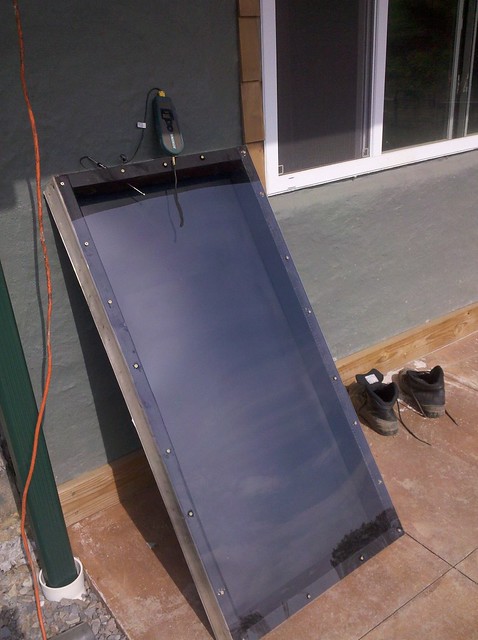
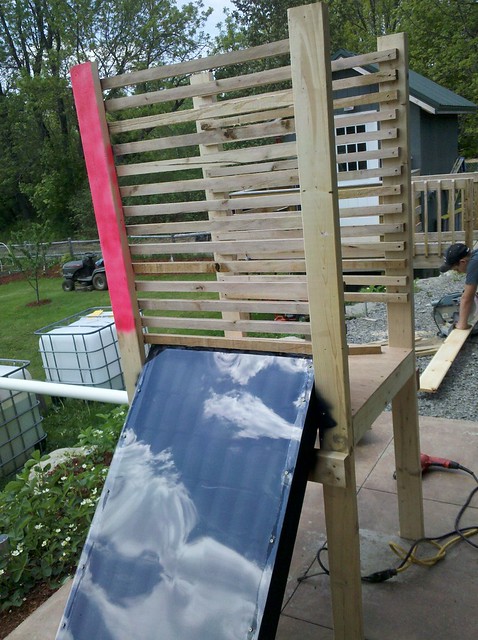
and stood the panel up into the frame to test the angle
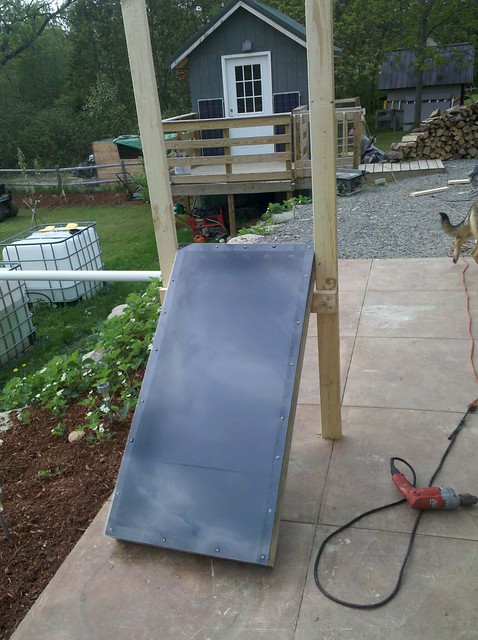
and was able to get the temp up to 136
so I took the lexan panel off
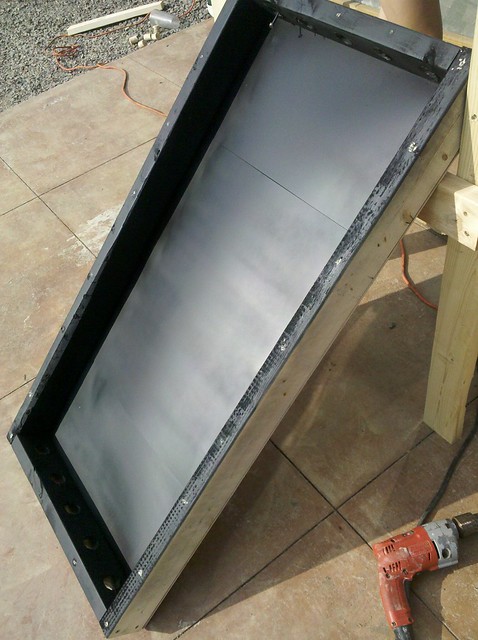
and mounted some netting across the bottom holes to keep bugs out of the chamber
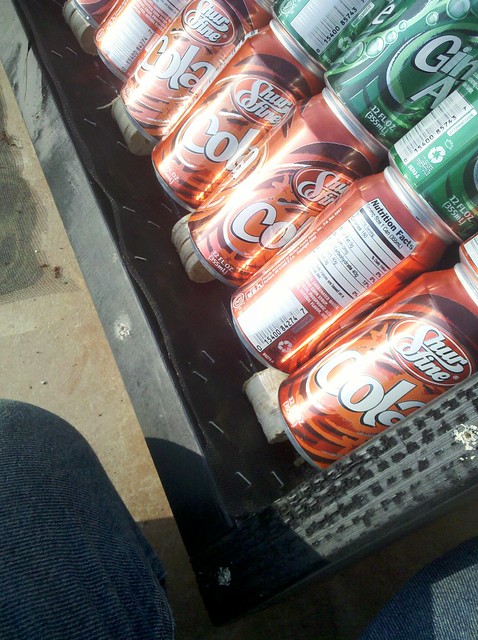
I used some soda cans I had and placed them into the chamber to increase surface area for creating heat

I used the scraps from my whole saw to block up the cans so they didn’t interfere with air flow
and spray painted the whole thing black

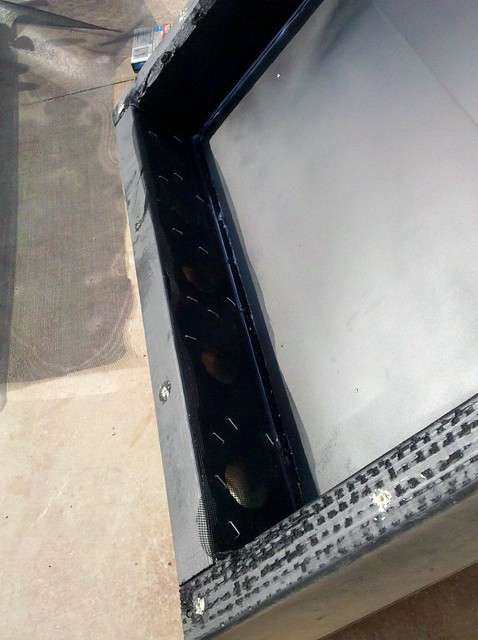
I used the netting to hold the cans in place
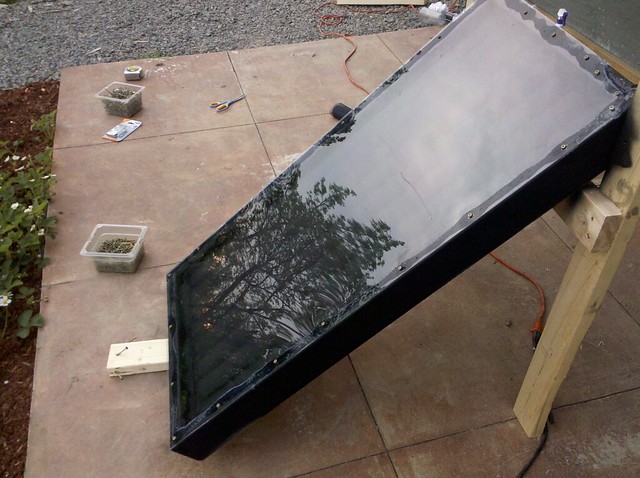
I trimmed off the excess netting and ran a bead of silicone around the frame
and remounted the lexan, I overtightened the screw in the top right corner and cracked it, awesome
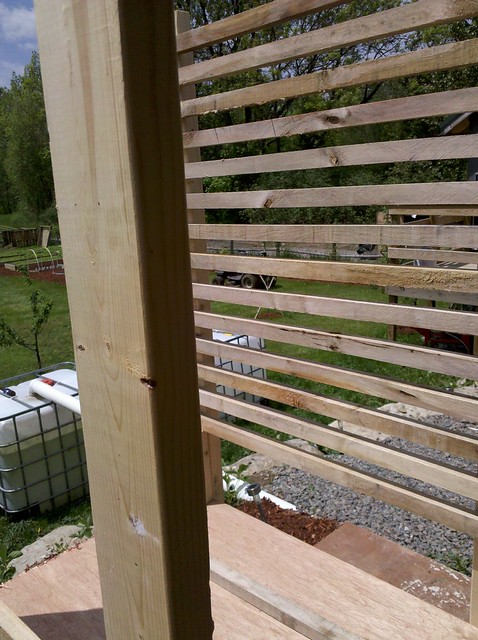
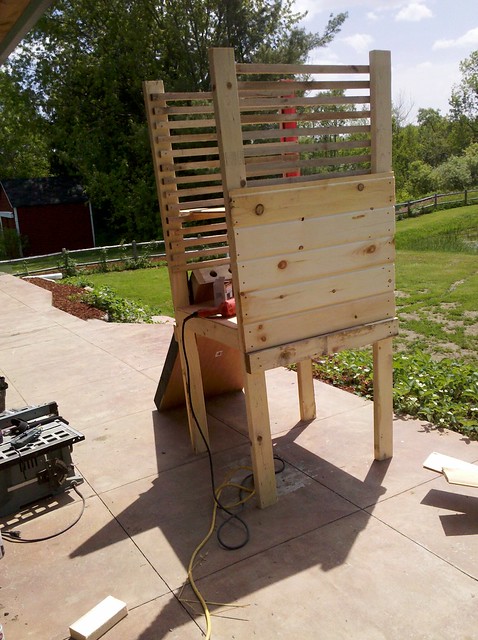
I continued building the frame for the chamber
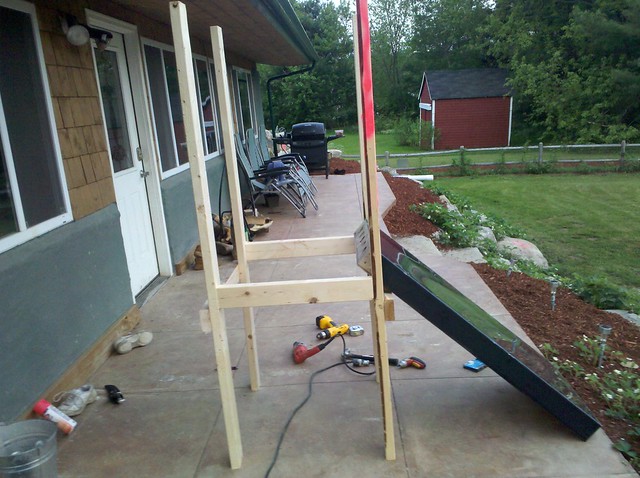
and screwed down a scrap piece of luan for the base
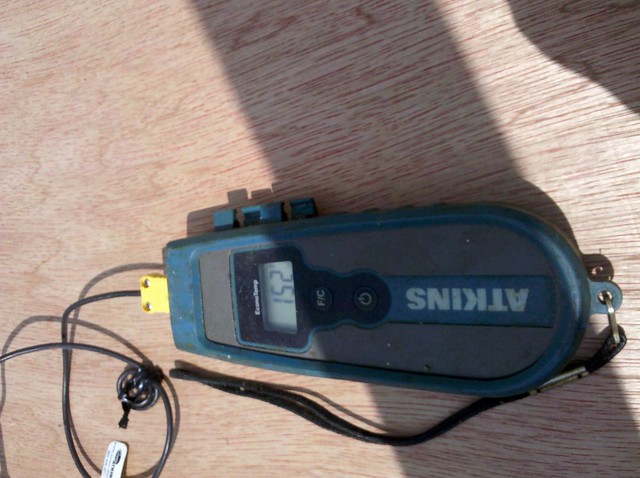
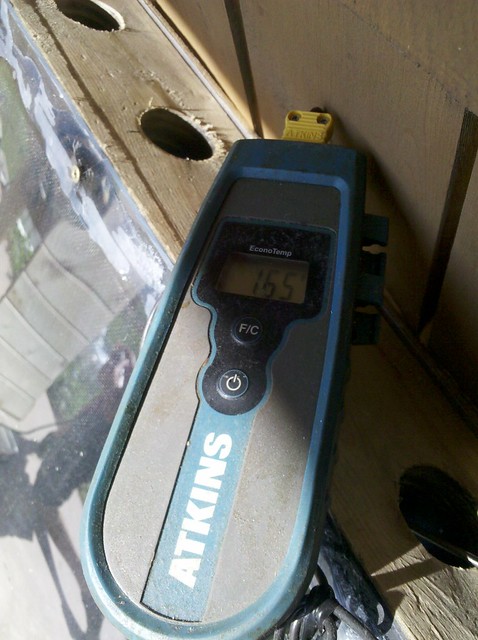
I did another temp test
and was able to draw 152 degrees
I used a piece of scrap wood to establish spacing for the tray holders
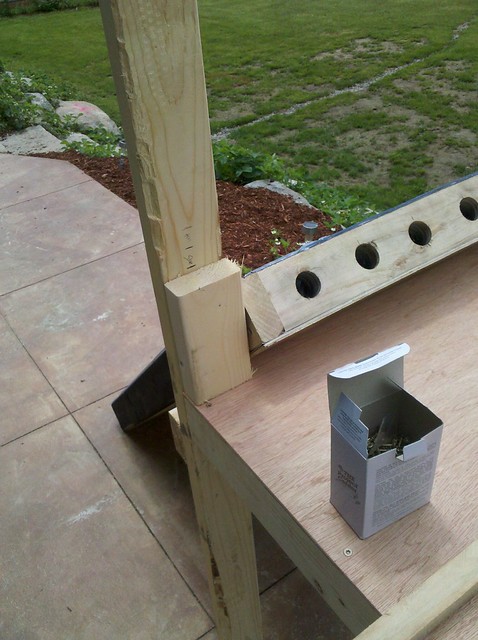
and screwed down a scrap piece of 1x material
and continued screwing them down

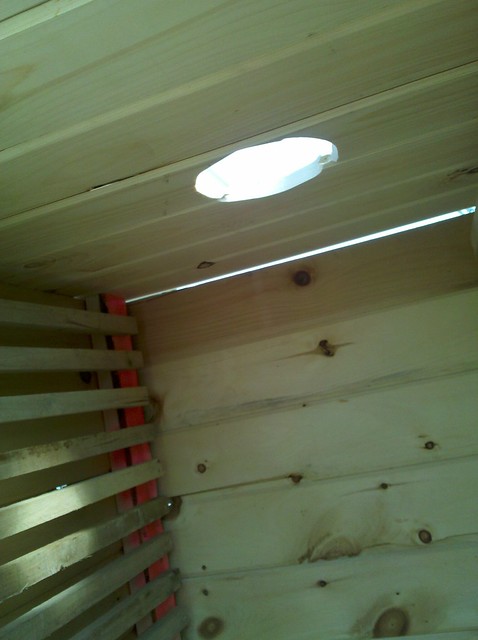
and mounted the other side
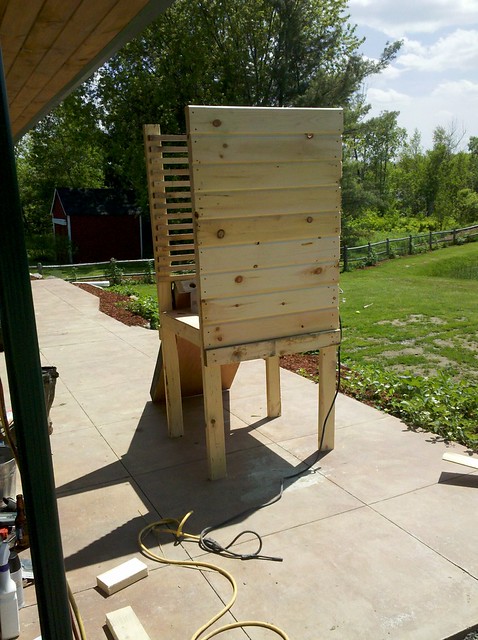
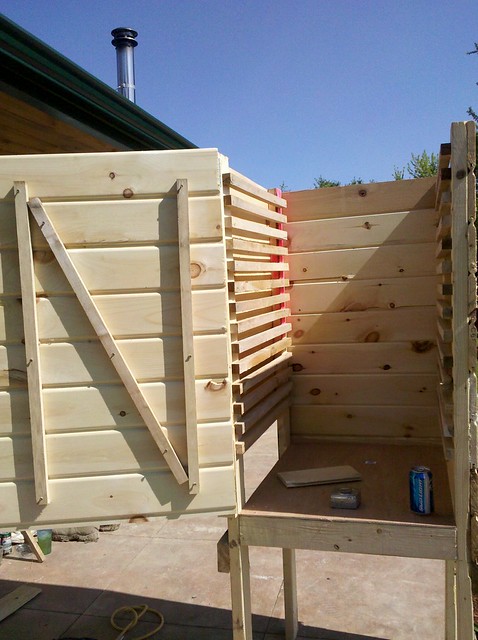
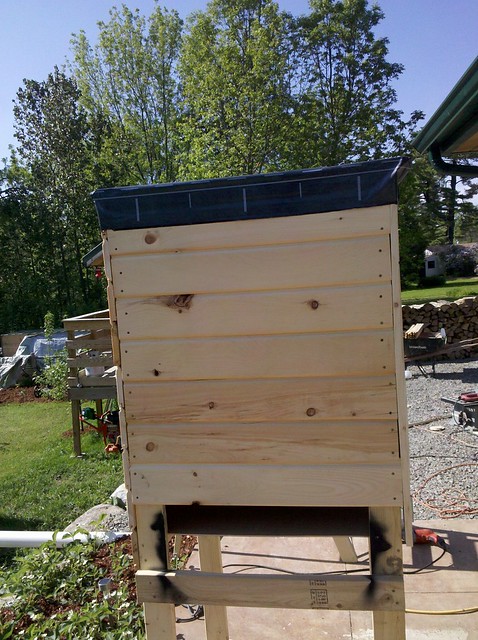
I used some scrap T&G pine I had to cover the outside
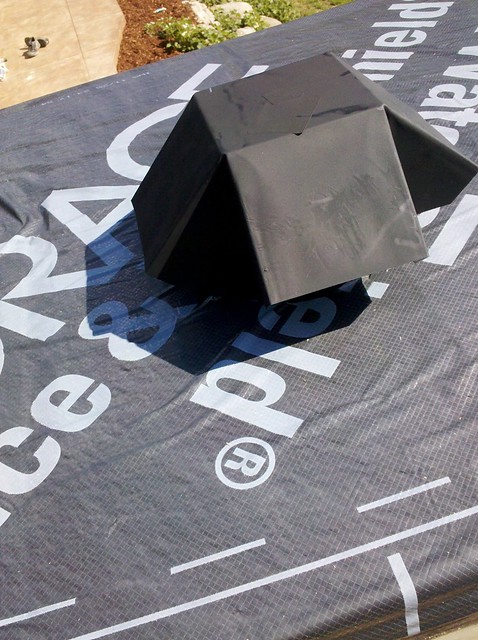
I picked up a vent for the roof

and spray painted it black to help with draft
I started sheathing the other side
and did a quick temp check and I was still over 150
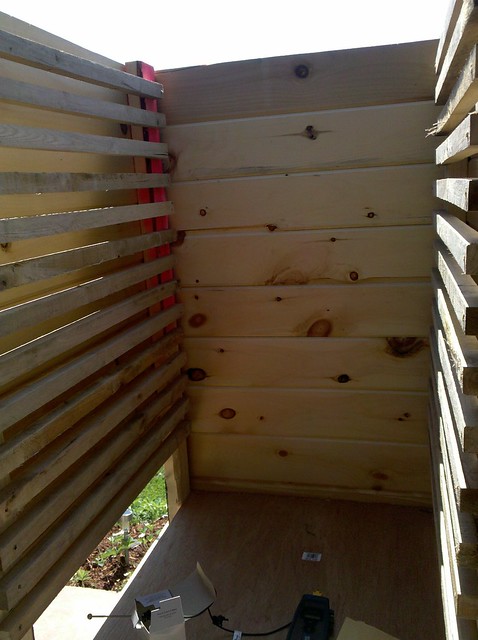
I sheathed the back wall
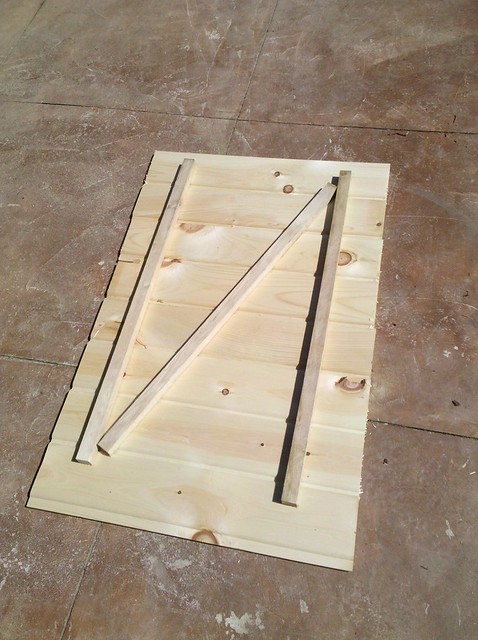
I made a simple door and z backed it for stability
temp check
I mounted some simple piano hinges
and mounted the door
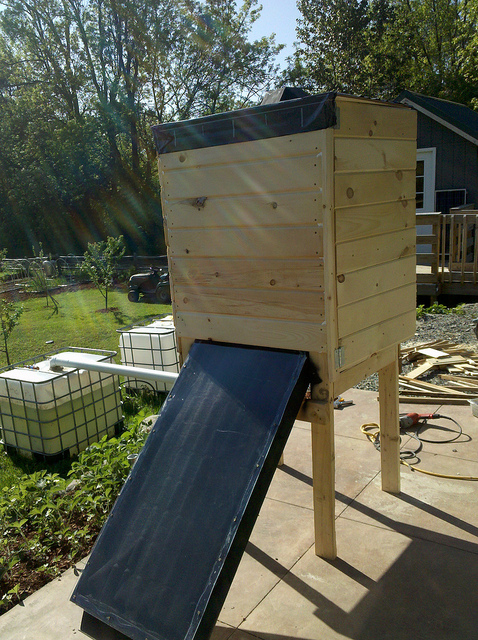
I used more scrap and set up the roof and traced out for the vent
I cut out the hole and mounted the roof
temp check
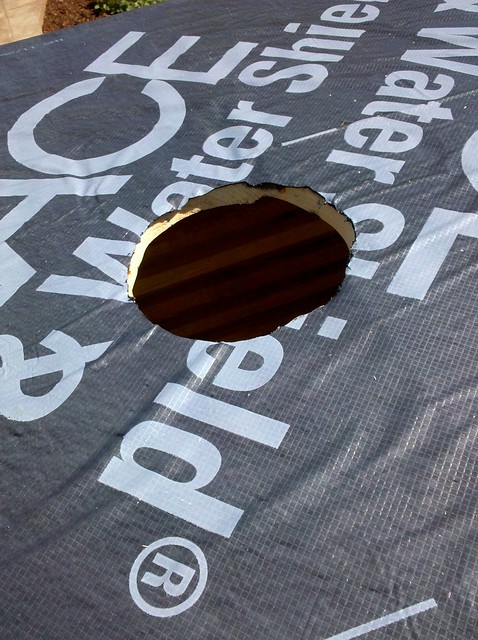
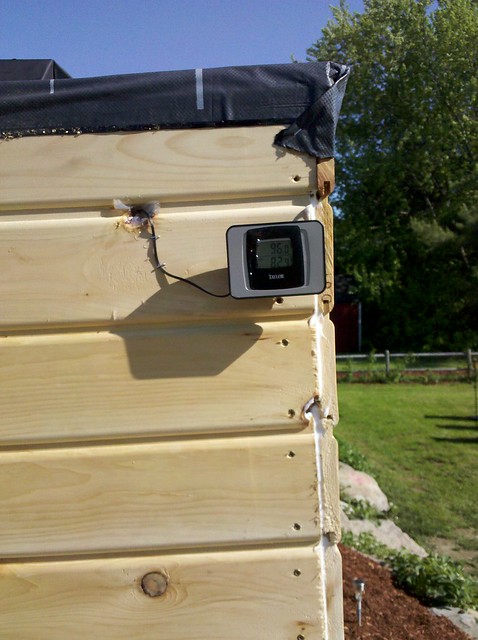
I had a scrap piece of ice and water shield
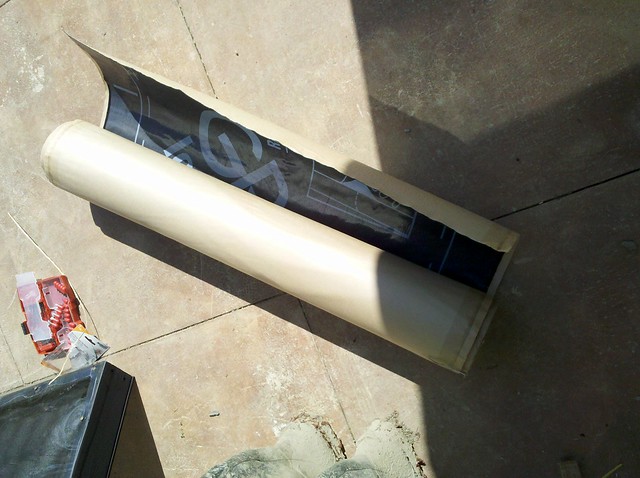
and mounted it on top of the roof
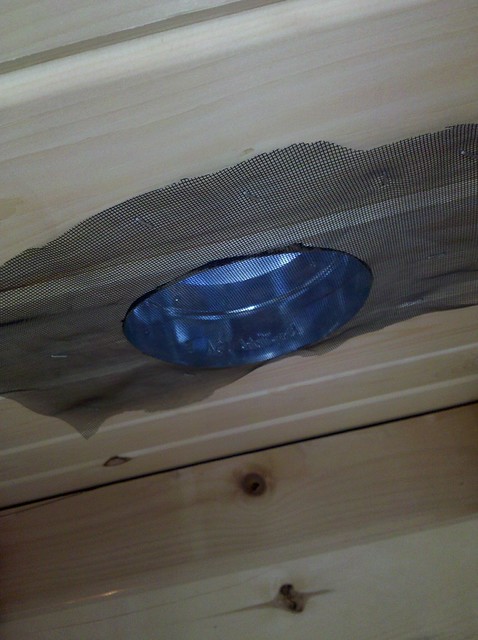
I cut out the hole for the vent
and mounted the vent
I stapled a piece of screen across the opening
I picked up a cheap digital thermometer
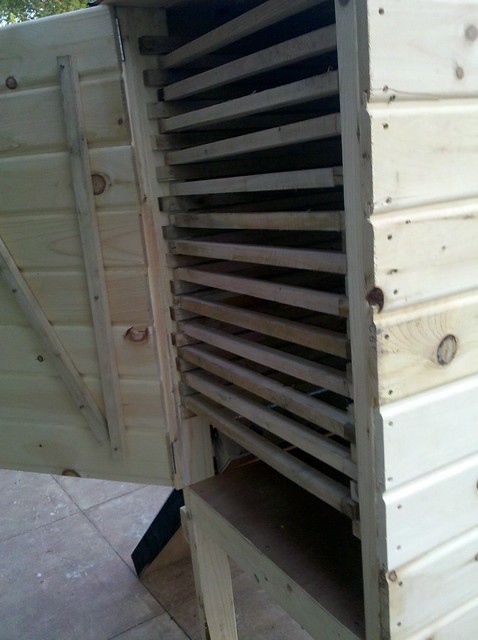
I used some 1x material and made some tray frames
and stapled screen material on the trays
I loaded the chamber with the trays
It is all complete, it took me about 6 hours from start to finish
With everything that happened last summer with the loss of my wife’s father and everything else that happened we didn’t get a chance to play with it a lot. A couple of design flaws that I need to fix this year. The bottom is a dead space where the solar panel comes into the chamber, so I want to install insulation to fill the space. Second is airflow through the solar panel, the way the cans are set it restricts the air flow to much and actually overheated the panel and caused the lexan to buckle and shatter.

I think it would have been better served with less cans and leaving a straight shot for airflow. A lot of people will actually just use the solar collector without any cans. Airflow is more important than heat. This project will be continued!


When dehydrating it is all about airflow.
Yes, for safety reasons (beef) most meats should have at least ten minutes at 160 for bacteria. Most dehydrators will be run at 155 with full airflow.
So it is about attaining as much temperature as possible and controlling the temp through the use of fans.
The second most important thing is ventilation, less vents = higher heat. It also means more air movement before finding a way out of the system.
In NA it should be easy enough to find solar powered fans and hook up a variable speed control for them.
Imo that is a great solar dry box with a few mods done.
That is awesome. Thanks for the detailed blue print. I plan on building something like this summer. What kind of paint did you use?
This is a typical example of the same solar box dryer that the Rodale Istitute was recommending 35 years ago. It seems so novel and intuitively correct to all who see it for the first time. Sort of an electric box dehydrator switched to solar collection. Only problem is these never work well in a humid climate, despite full sun. Pushing the same moisture through that meany screens is kind of pointless. You have to keep turning the collector to “track” the sun. And the size of this collector, compared to the square footage of screens, is completely inadequate except in the hottest, driest climates or highest altitudes. Our experiments 30 years ago with this and similar designs led to a revolutionary approach based on radiant drying instead of convection. The results were so much better that we published the results back in 1985 and the design has since been copied worldwide. You can find information about it at http://www.geopathfinder.com/9473 . Think outside the box!
Bob Dahse,
Thanks for the extraordinary link to the geopathfinder site. I’ve got some double-paned glass recycled from some windows that needed replacing and I’ve been looking to build a solar dehydrator. I’ve done the vertical box and had to mess with moving the trays about to evenly dehydate the food. I’be been kicking around a design kinda like the one in the link but why re-invent the wheel if the first wheel is round?
About the only change I might make is using Aluminum sheeting that I’ve anodized black instead of using black paint since I can anodize the Al flashing myself.
Thanks again for the wonderful link!
Would this work in north-eastern Missouri? Our temp ranges from mid 70s to low triple digits from between June and early September. In August, we dropped to the 40s at night….no higher then mid 80s during the day. Full sun, so would it work? I’d love to know so I know whether or not to build one…..thanks!!
yep, you can also make a simple one out of a cardboard box to experiment with
http://www.motherearthnews.com/diy/recycleable-solar-dehydrator.aspx#axzz2dmjk4dgj
I just built one like this with variable speed fans. http://www.instructables.com/id/Large-Scale-Solar-Dehydrator/
I took your advice and made air channels inbetween the beer cans.
awesome, have you tried it yet?
Has anyone tried removing the tops and bottoms to the beer cans to facilitate air flow?
Yes, we have since modified it like that, I need to update this post with some pictures, another option would be metal dryer vent painted black, some people will just use the metal backing and skip the cans, airflow is important more than high temps
I also made one, it has some resemblance to yours.. some 🙂
http://www.spacepetuniareview.com/2014/11/diy-building-solar-can-air-dehydrator.html
Very nice!
[…] your own solar dehydrator is an excellent DIY project for those trying to be less dependent on the energy grid. Have fun […]
[…] 15. Step by step plans to build a homemade solar dehydrator. […]
Hi, are you guys talking in Celsius or Farenheit, please? Thank very much.
Farenheit