27 Aug ’14
 Offline
Hey guys, decided it was about time to share one of my own projects. One of the first things I will need to do when I get back is add a bathroom addition to my house. It's a 4/1 and we have a big extended family so in order to accommodate guests, I would like to add a bathroom to what is currently the largest bedroom. In order to do so I will need to add a 10'x6' room to the house. I was considering pouring a slab because I don't have much vertical space to play with but have concerns over the DIY nature of a raised slab and not having any experience with them. Given the builds that I have seen here and a few other sites plus the accessibility of a crawl space, I have been leaning towards a dry-stacked-block setup with surface bond cement.
The first photo is the placement. One of the short walls backs up to the existing slab which was poured on grade in the 50s.
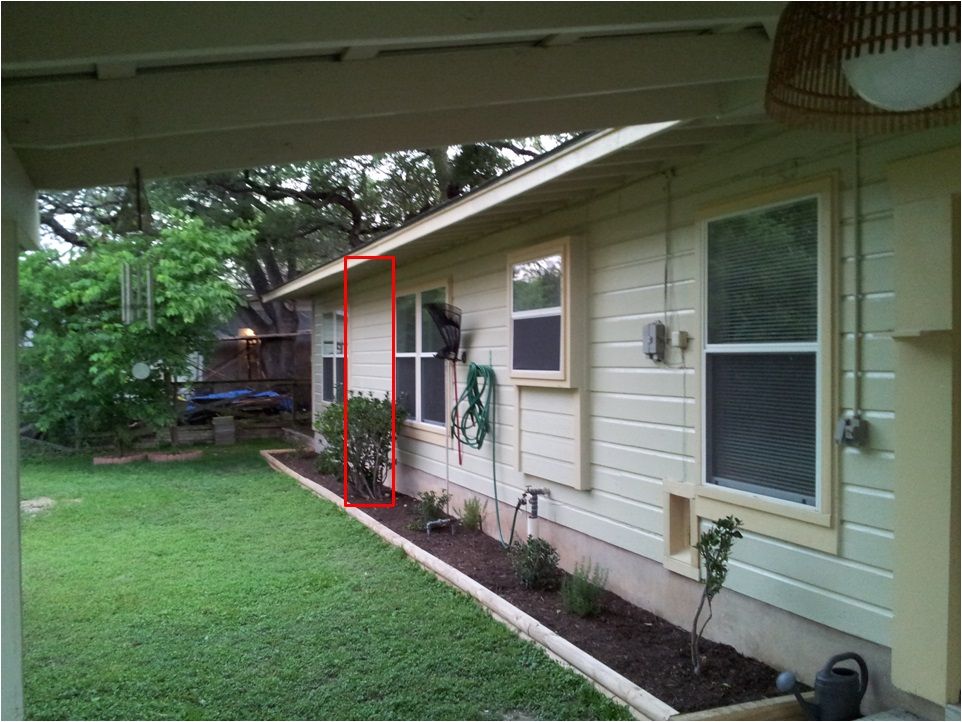
The second photo is the general layout.

The third is a detail of the build:
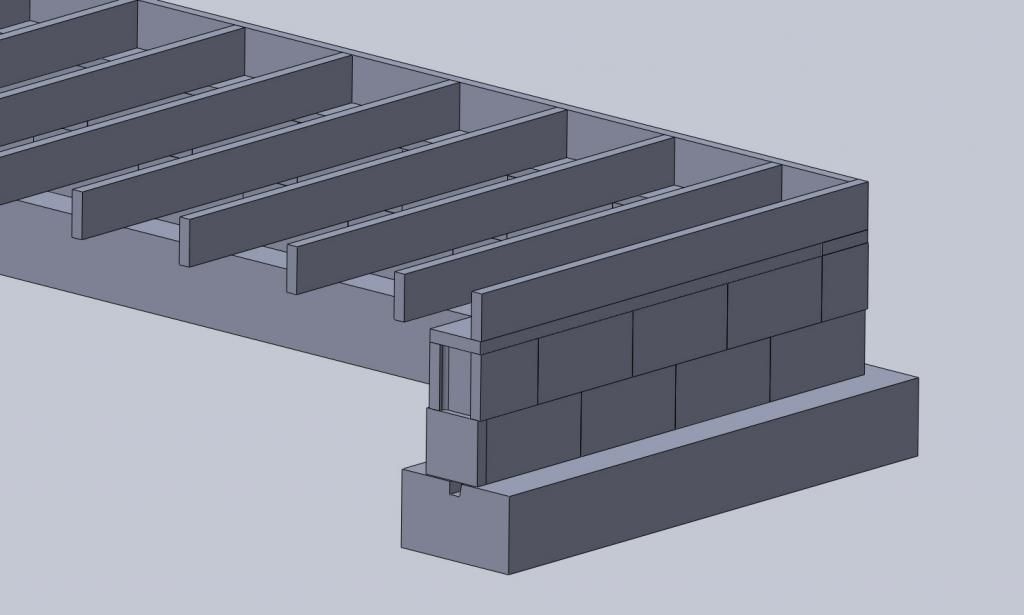
From the bottom up:
9"x16" footer with two 1/2" sticks of rebar 3" up from the bottom wrapped around the perimeter. I put a key way in and will fill the bottom course halfway up with quickcrete.
8"x8"x16" blocks
2"x8" PT cap anchored 12" from the corners
2"x6" PT floor joists @16" OC
At this point (before I build up the subfloor) I wanted to ask a few questions:
1) Does this seem like the easiest and most economical way to go about a DIY?
2) I am running into issues with the blocks. Specifically, the 8"x8" corner blocks are not exactly half the width of the 8"x16" blocks so am I dimmensioning them incorrectly (7.625x15.625 and 7.625x7.625)?
3) I would like an access port for the plumbing (again, first build) - As is it is 18"x32". I know that I should have 8" of clearance off the ground but I may have to take one course of the blocks off anyway just due to the height (I haven't measured the gap between the bottom of the current floor and the footer.
Just wanted to get a central spot for the project going. Thanks for the input guys!
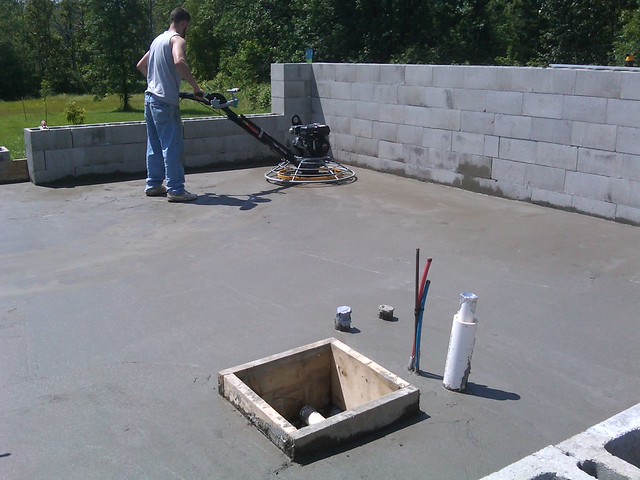
we have done pier foundations, slabs, block, etc. From my experience, once you add in the wood, flooring, insulation, etc. The slab is the cheapest way to go.
even if you poured a 6 inch thick slab, you are only needing just over a yard of cement, add in extra for a thickened edge for a monolothic slab, you're still under 2 yards, up here a yard run about 90 dollars, so you would be in it for under 200 dollars, you can add dye to the cement which doubles the price of the cement, but you have a finished floor
when we did the remodel at our business, we added the dye and cut a 3x3 grid in the floor, it looks like huge floor tiles, this is 7 years of use in a high traffic commercial environment

when we did the patio out front of the house, we stained the cement afterwards for about 20 dollars
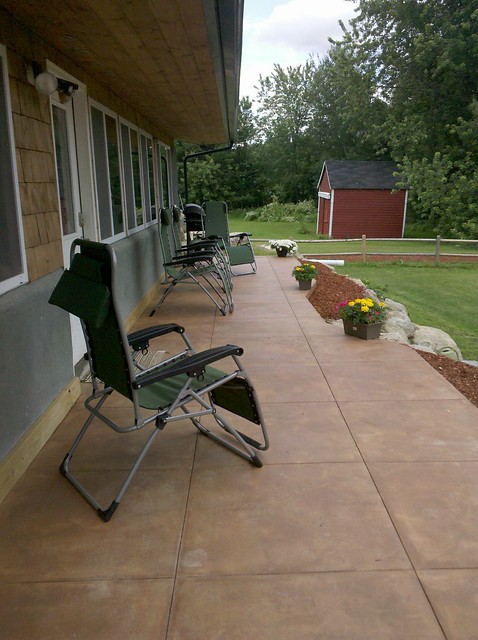
you can see the process here
http://thehomesteadi.....ent-patio/
That was 4 years ago, here is how it looked yesterday, being exposed to the weather and high traffic, it has worn in spots, I like it, my wife wants to restain it

we used the same product inside the house and it has held up much better, it has a pretty cool leather look to it

I have never acid stained, but it is only limited by your imagination

http://coatmasters.h.....ining.html
Another option for access is building access panels into the floor like this if you go with wood.

here is volume calculator for filling your cement blocks if you go that route, I used it when we filled the cores of the house and it was pretty darn close
http://concrete.com/.....alculators
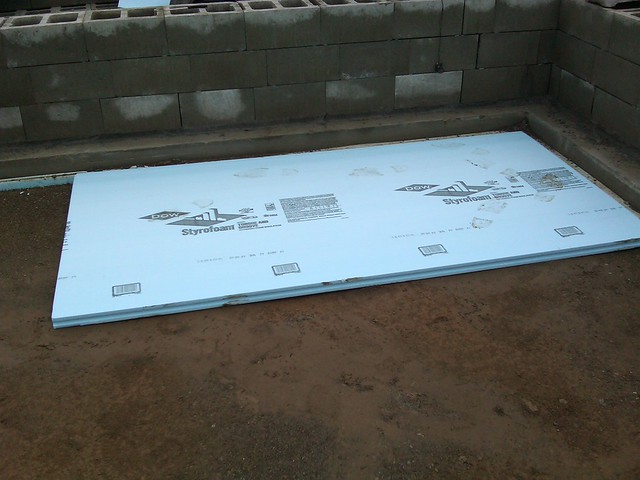
as far as measurement concerns, each block will be different, small vertical gaps aren't a deal breaker, what we did though was we got a diamond tipped saw blade for the circular saw and cut down the blocks, you can see one here in the top right corner and gaps in the blocks
one thought to solve all the issues, clearance, access, etc. What about pouring a slab, framing a floor on top of that, then install access panels like in the picture above?
But if it was me, I would go the slab route, my only question is, if the existing house is already on slab, how are going to tie into the water and sewer?
27 Aug ’14
 Offline
Alright, I'll get to work changing the model to a slab (much easier from a modeling perspective). Is it alright to pour it side by side with the other one or should I run some rebar into the current slab and join the two? I would rather avoid damaging the current slab since it seems to be doing so well given its age. I'm not sure if it is recommended to just run them side by side with some epoxy running up the seam.
As far as tying into water and sewer, I am left to tie in once everything has left the perimeter. The house is still on septic so I can tie the sewer line in right before it gets to the septic tank. There's an irrigation faucet about 20' to the right of the site (can be seen in the photo above) that I planned to tap off of for cold water. And the hot water pipes that use to run under the slab busted some years back so they were run through the attic, which allows for easy access as long as I insulate the pipe. I will likely have to have another breaker installed so that I can run everything in the bathroom on a separate loop.
I love the floor access idea but I would like to have tile in the bathroom for longevity so I don't think that I'll be able to include it in this project.
As far as the clean-out for the plumbing, should I have it sticking out of the side of the slab or just have it accessible from somewhere in the bathroom?
for tying together, we drilled every 2 feet or so and pounded in 2 foot sections of rebar
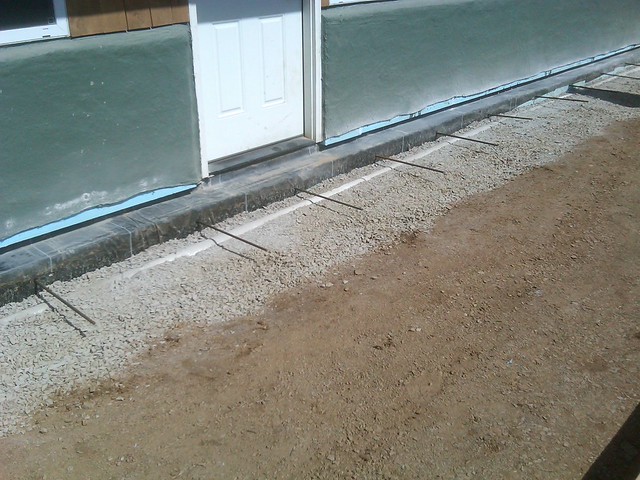
we then used that for wiring our perimeter rebar to
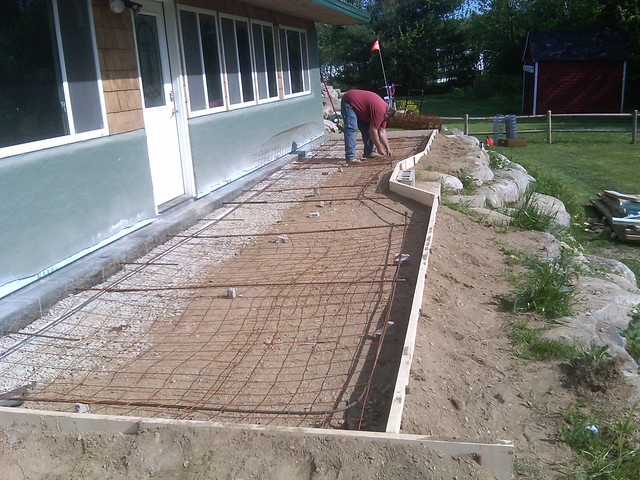
I would recommend getting quotes from professionals, I think you might be surprised how little it will cost to have someone do it for you, same with the rough in plumbing under the slab, you really don't want to mess that up, so many things can go wrong, wrong height for the toilet flange, wrong pitch etc
as far as the cleanouts, we have one right where the sewer enters the slab, you can see it in the top right corner
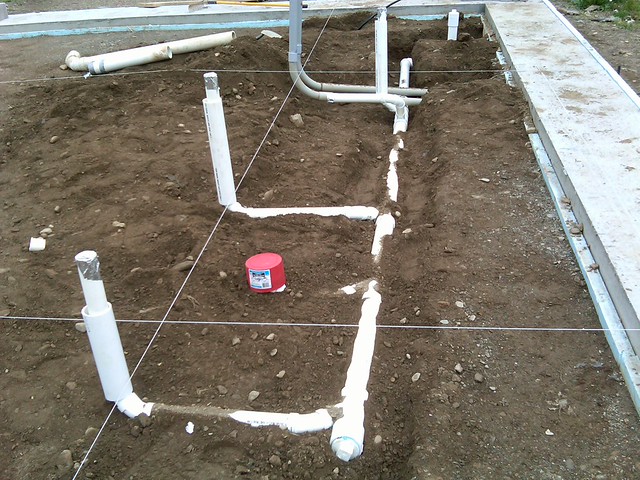
the vertical pipes on the left are the vents for each one of the soil lines, we have cleanouts on each one of them
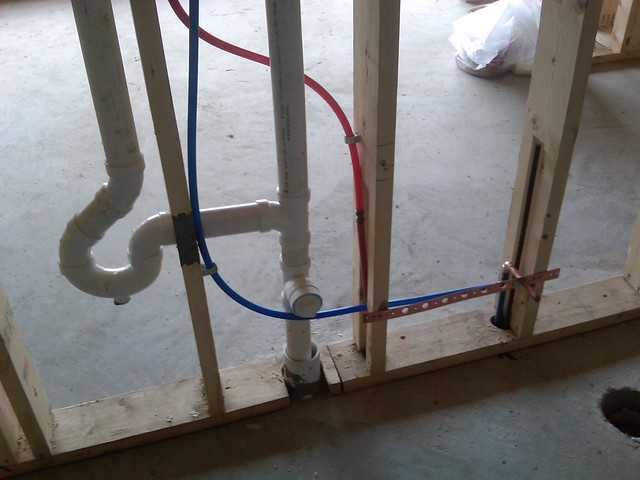
another option would be to frame out a access hatch before the pour and make a lid for it
27 Aug ’14
 Offline
I suspect that I will still have to do the footer and dry stack around the perimeter just because I will need to back fill and compact it before pouring the slab. The only other way that I have found online is to just pour a really tall footer, back fill and compact, and then pour the slab in a second pour.
I'm finalizing the layout now but I will post pictures of it tomorrow.
Also, why did your pour the slab 6" thick? Everything that I have found indicates that 4" is more than sufficient and 5+ is only considered necessary in the event that a heavy point load will be introduced (as is the case for driveways). More thermal mass for climate control?
27 Aug ’14
 Offline
farmboy2 said
not sure where you live, but make sure you pull permits if they are required. looks like a fun project.
Thanks farmboy! I believe that I will need an electrical permit, plumbing permit, and a few inspections along the way. To be honest, my only real concern with those is having them identify projects that the previous owner did without said permission.
icanreachit said
I suspect that I will still have to do the footer and dry stack around the perimeter just because I will need to back fill and compact it before pouring the slab. The only other way that I have found online is to just pour a really tall footer, back fill and compact, and then pour the slab in a second pour.I'm finalizing the layout now but I will post pictures of it tomorrow.
Also, why did your pour the slab 6" thick? Everything that I have found indicates that 4" is more than sufficient and 5+ is only considered necessary in the event that a heavy point load will be introduced (as is the case for driveways). More thermal mass for climate control?
yeah, 4 inch is more than adequate, it's what garage floors are poured, I just use 6 inch when doing quick calculations, 6x10x.5 is much easier than 6x10x.333, well actually not really in that scenario, but you get the idea lol
Most Users Ever Online: 698
Currently Online:
53 Guest(s)
Currently Browsing this Page:
1 Guest(s)
Top Posters:
easytapper: 2149
DangerDuke: 2030
groinkick: 1667
PorkChopsMmm: 1515
Gravel Road: 1455
Newest Members:
Forum Stats:
Groups: 1
Forums: 12
Topics: 11482
Posts: 58640
Member Stats:
Guest Posters: 2
Members: 19842
Moderators: 0
Admins: 1
Administrators: K

 Log In
 Home
Home


