
 Register
 Log In
 Home
Home
15 Feb ’12
 Offline


Someone had asked me to repost this last night, so here goes.
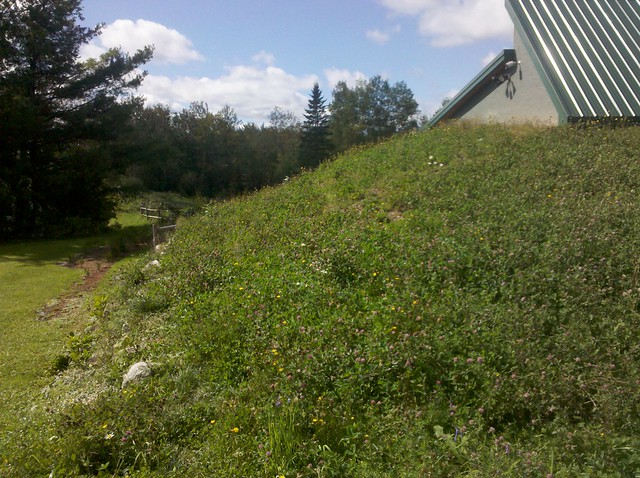
After our fiasco with our pit greenhouse my wife and I were looking for a plan B. My wife's father had spent several weeks with us last June and had helped me build a gazebo for my wife. When we finished that we were talking about what other projects we wanted to finish up around the house. I had mentioned I wanted to build a greenhouse and he asked what I was thinking of building. I said I was thinking of building a simple pvc setup or I was also thinking of building into our side berm on the southern side of our house.
My FIL was a big supporter of our projects and he would come up several times a year and work on different things with us. He said he thought we should build it into the berm, it would fit into what we had already done so far and would be a fun project. I told him I would think about it as he was going to come back and visit us in August. I told him I would make a decision by then and we would built it together.
Unfortunately Dad passed away in July. I decided to honor his wishes.
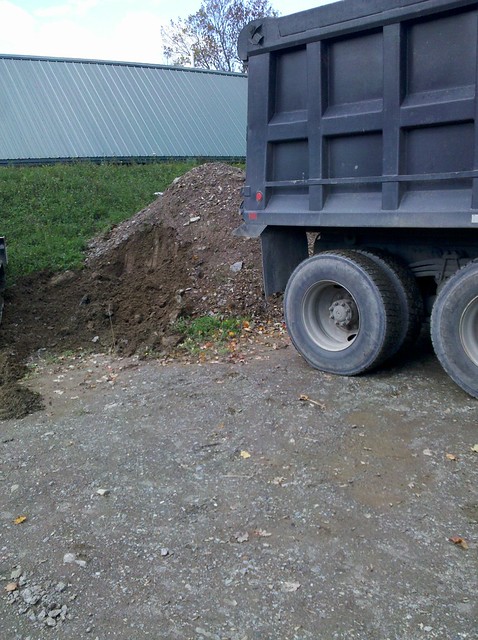
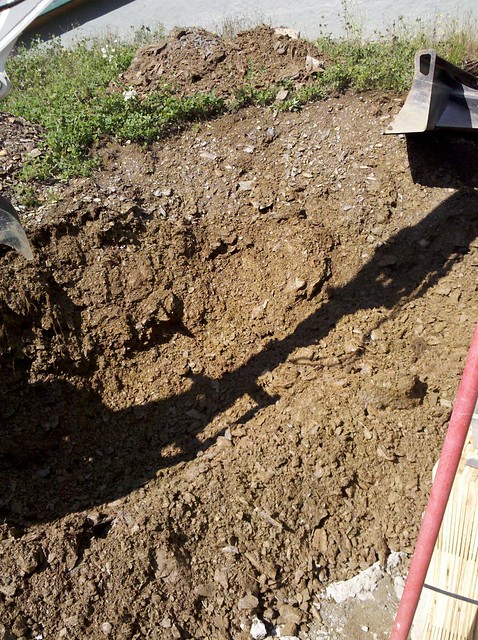
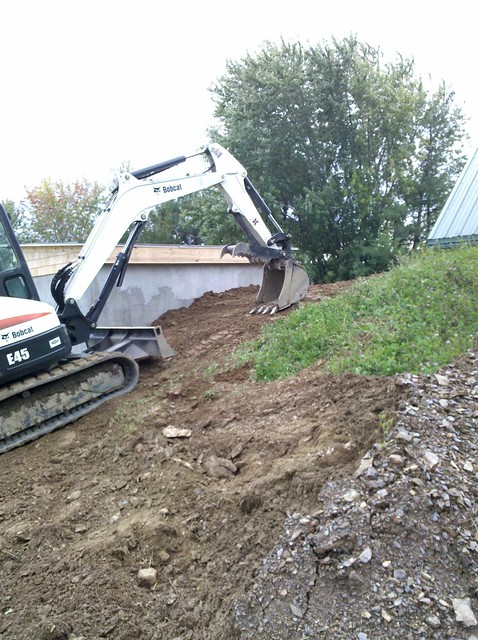
In the middle of September I had contacted a local company to come and remove part of our berm so we could start the construction. This side of the house is the southern side.
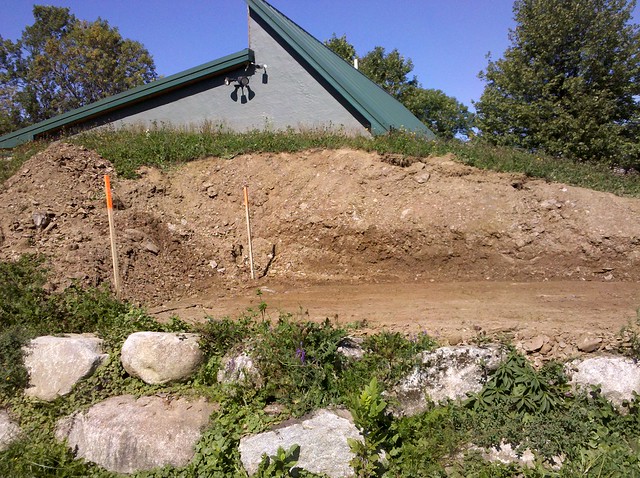
They said it would take a week or so for them to get to us, I told them no issues. One morning I woke up and the excavator was there. We staked out the area for the building and they went to town digging it out.
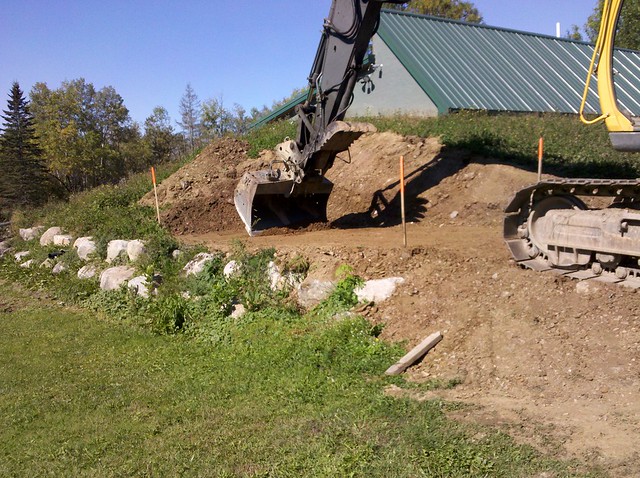
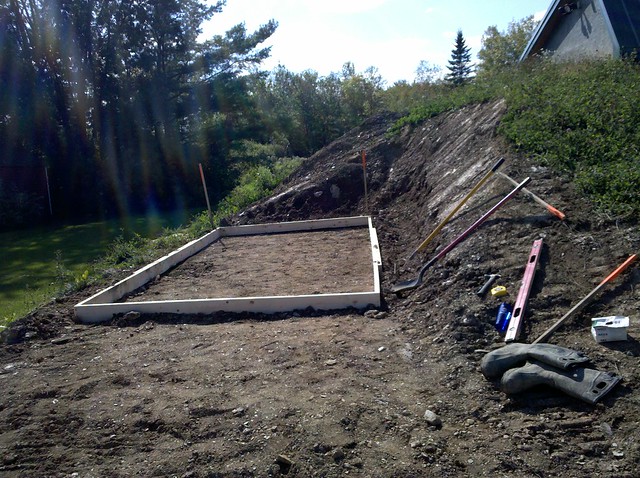
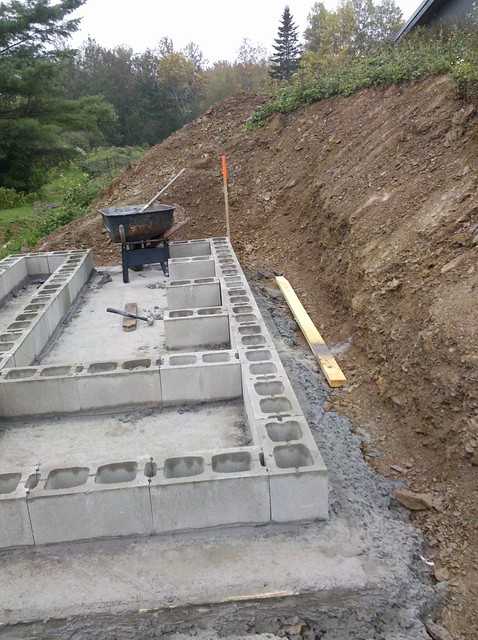
It took them all of three hours to complete the job. We had extended the excavation a couple of feet on each side to give me room to work as the walls went up.
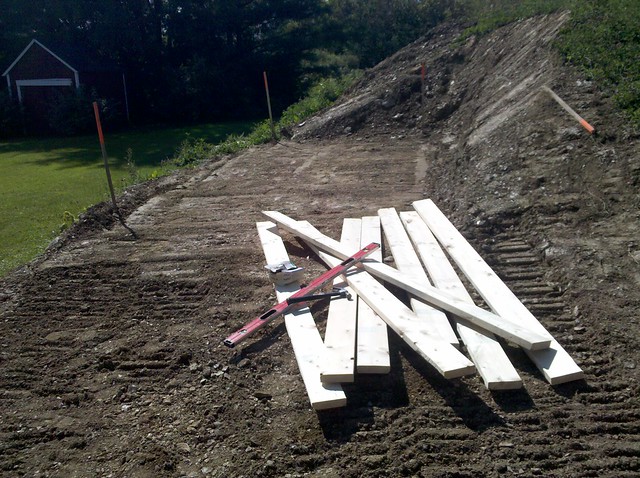
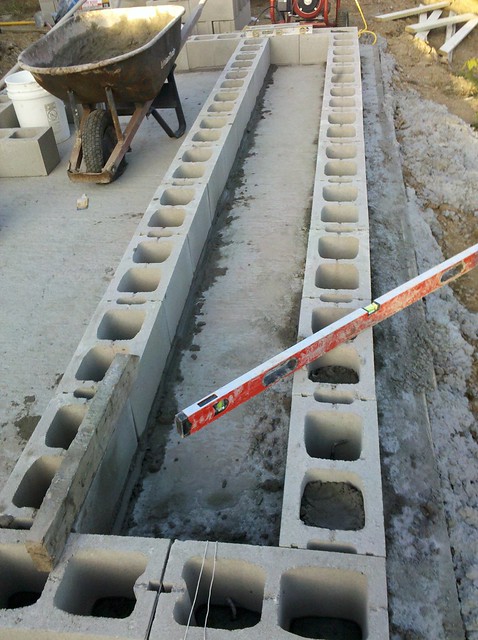
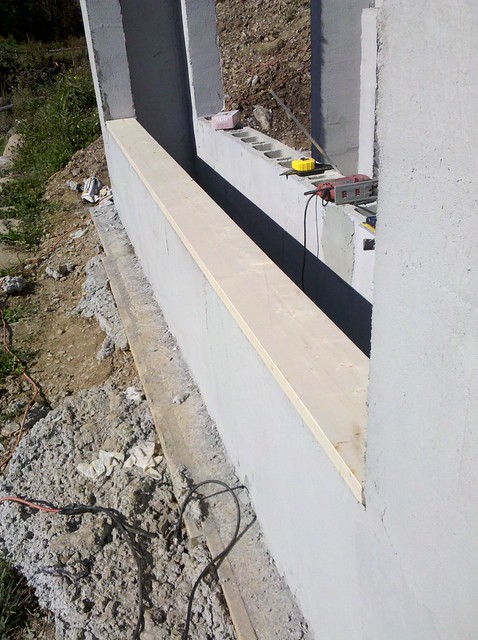
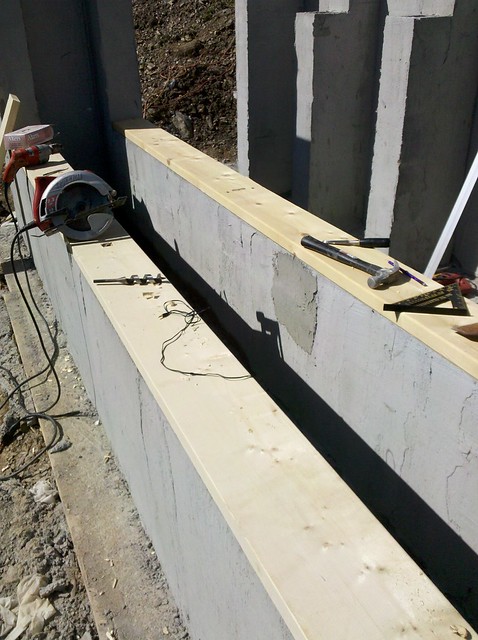
I ran down to the lumber yard and picked up some 2x6's to form up the slab with, We were going to build it using the drystack method the same way we had built the house.
I called the concrete company to schedule them to deliver the next morning but they informed it was suppose to rain and wondered if I would be able to take the cement that day. No problem I said, when would they deliver? 30 minutes was the response. So I quickly threw the forms up.
and 30 minutes later they were there

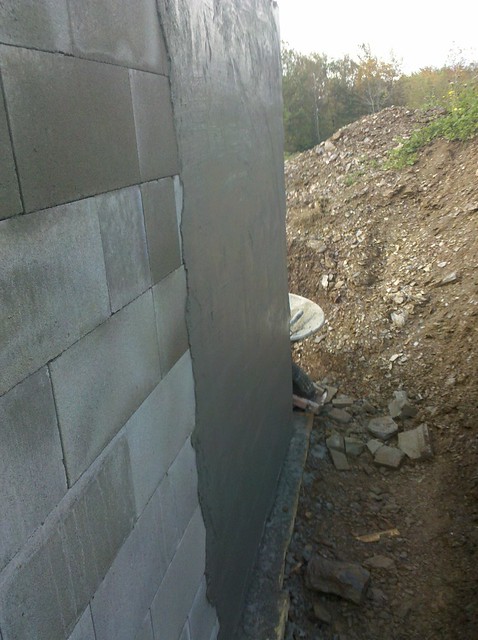
I didn't use rebar in the pour and instead went with the fiberglass reinforcement in the cement.
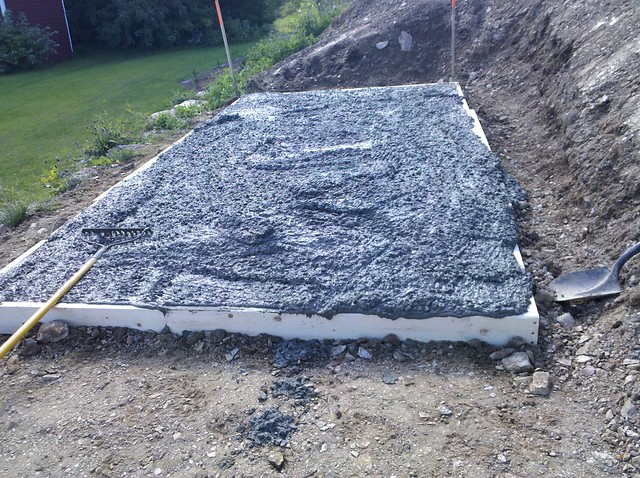
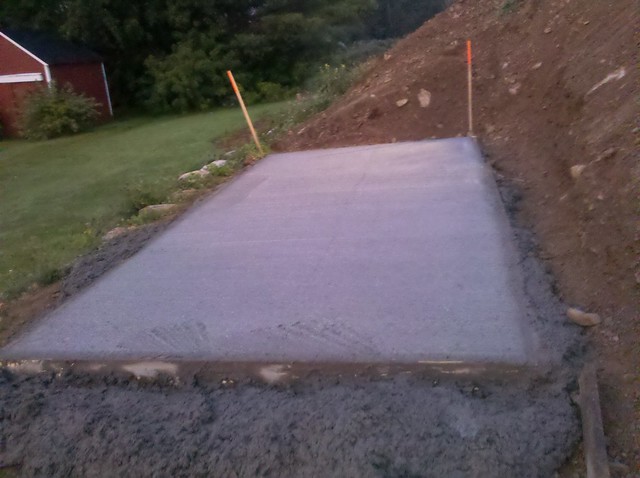
within a hour we had poured and screeded the slab and called it a night
15 Feb ’12
Offline
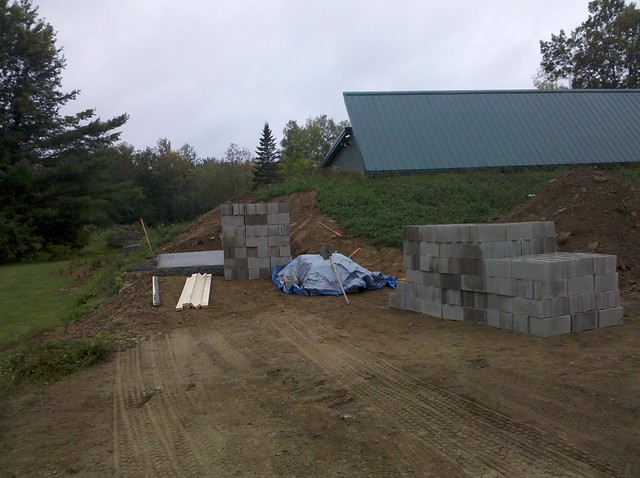
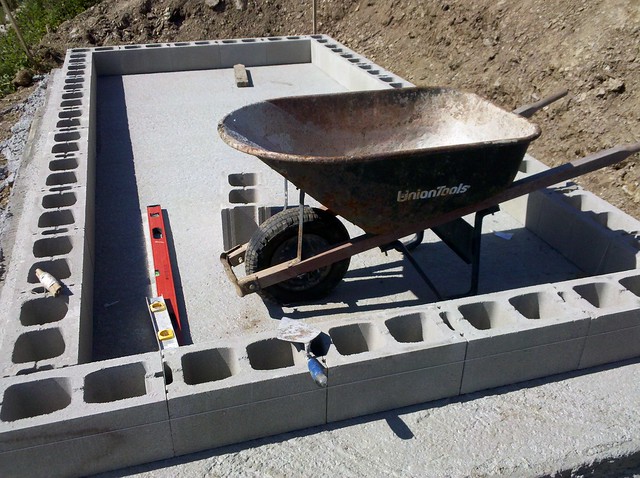
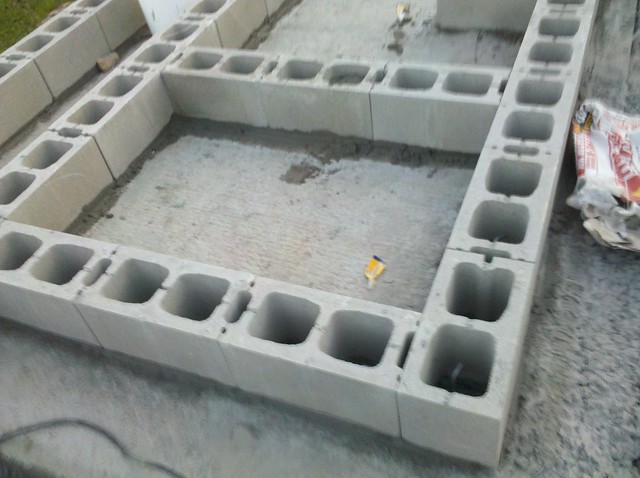
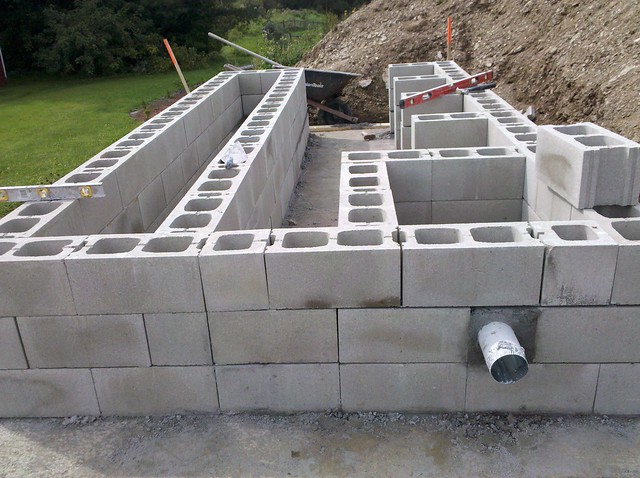
The next morning I called the local building supply store and ordered the cement blocks to build the structure with. The delivered them that afternoon but since it was raining I didn't get anything done besides stacking them.
Later in the afternoon when the rain let up I decided to do a quick layout to see how I wanted to place the building on the slab. Using a masons line I set my corners and worked around the perimeter.

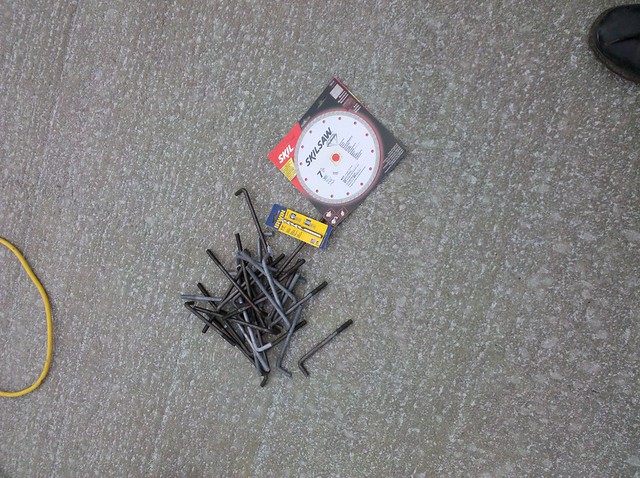
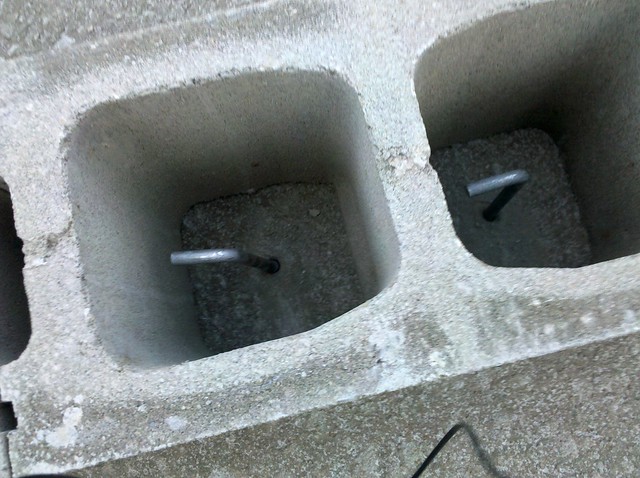
At this point I realized my design flaw. I was building it exactly as my house which means I didn't put a keyhole in the slab or rebar to set the blocks on. In our house it didn't matter because I poured a footing first and stacked my blocks on that. When I was 5 courses high I had poured my slab inside the footing and 2 inches up the wall to keep the bottoms of the wall from kicking in. The back filled dirt keeps the walls from kicking out. Since I had poured a slab and laying the blocks on that there was going to be nothing tom keep the walls from kicking in. I had one of two options; pour another thin slab inside the walls or drill out the slab and place anchor bolts in the cores of the blocks. I went with option two. I ran down to the hardware store and picked up a masonry bit, bolts and blade in case I has to cut any blocks.
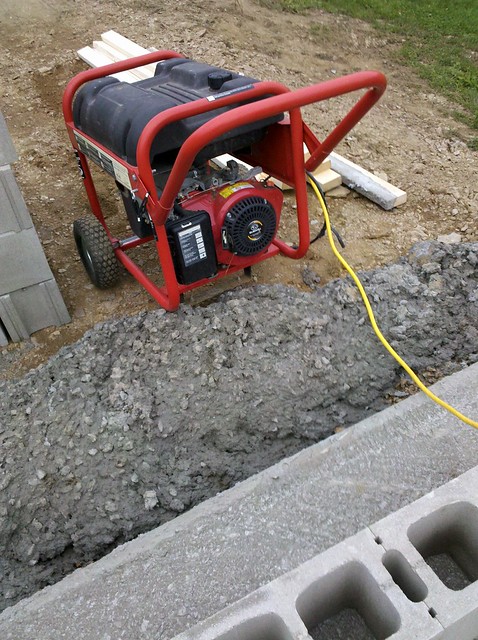
I broke my trusty generator.
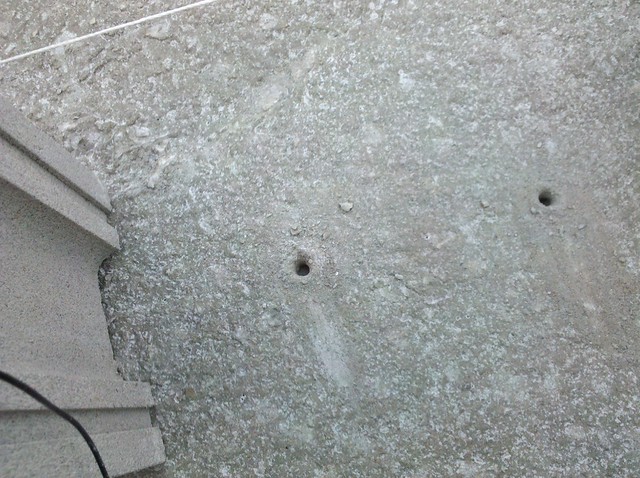
and proceeded to drill out the pilot holes for the bolts.
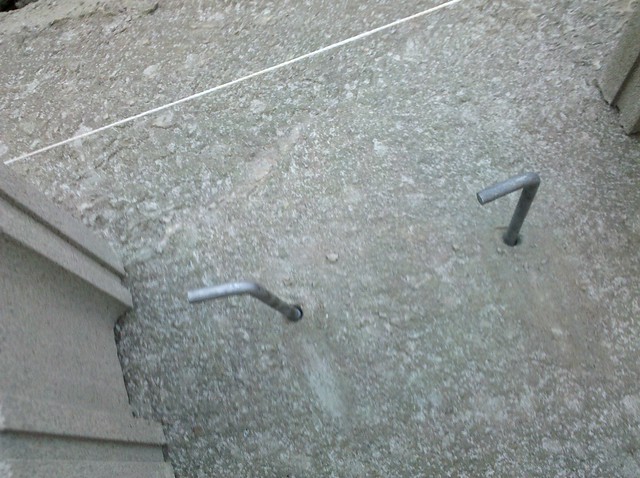
I hand tightened the anchor bolts down
and set the blocks back in place. I would fill the cores with mortar later on to lock them in place.
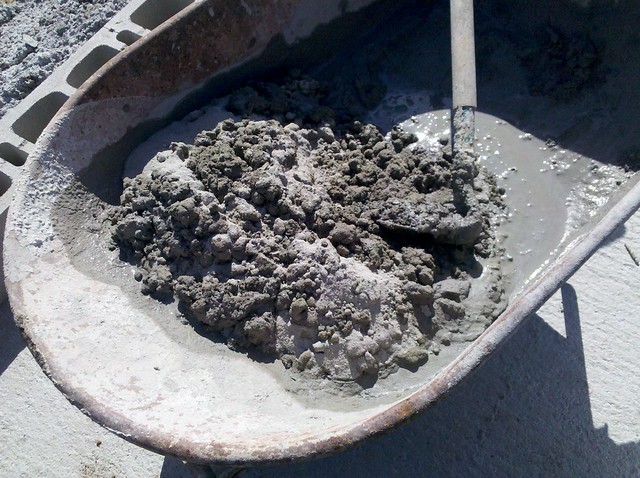
The next day the sun came out so I decided to start mortaring. With the dry stacked method you only mortar the first course to establish a level base not to glue it to the slab. I broke the required tools.
and proceeded to mix up some mortar.
Since the building was so small I was able to find my high point with my 4 foot level and just started working my way around the slab.
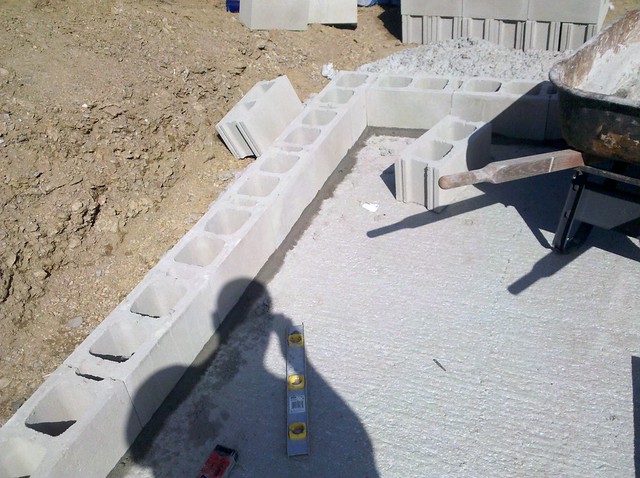
With this design I decided to incorporate a planting bed in the front.
I also decided to build a smoker into one corner of the building.
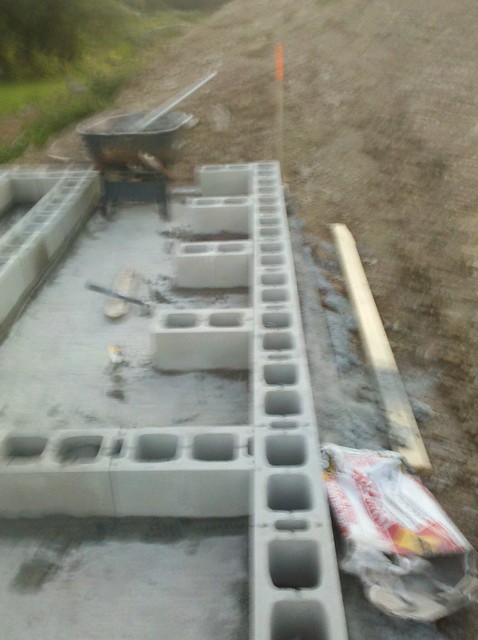
Since we were using 8 inch blocks I installed some pillasters for lateral strength. With our house we used 12 inch blocks so we didn't need them.
15 Feb ’12
Offline
I finished up the day by mortaring down the planter beds
after letting the mortar set for the night, it was time to fill the cores
I mixed up some bags of quikcrete and went around filling the cores with the anchor bolts to keep the walls from kicking in

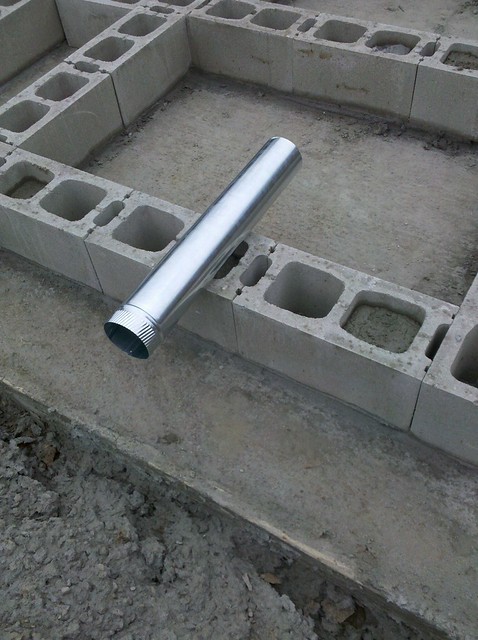
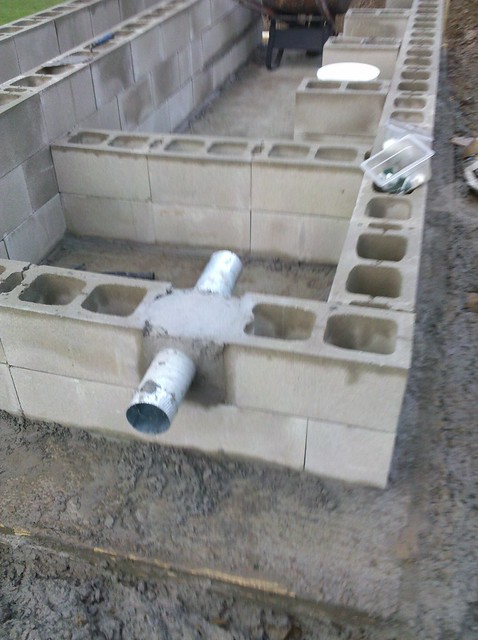
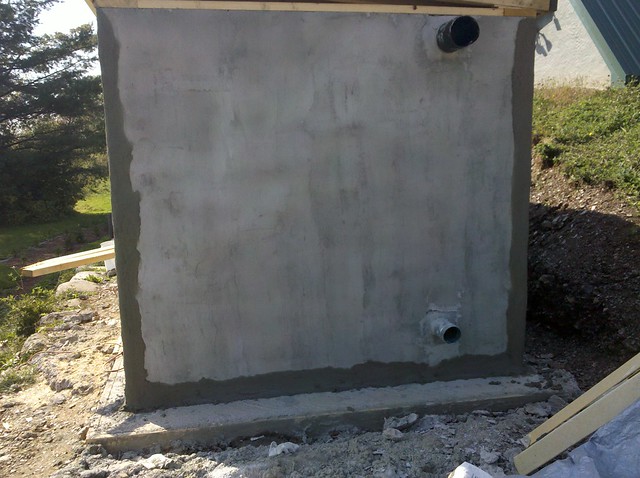
I was originally thinking about having my smoke chamber outside the building so I needed to put in a smoke inlet
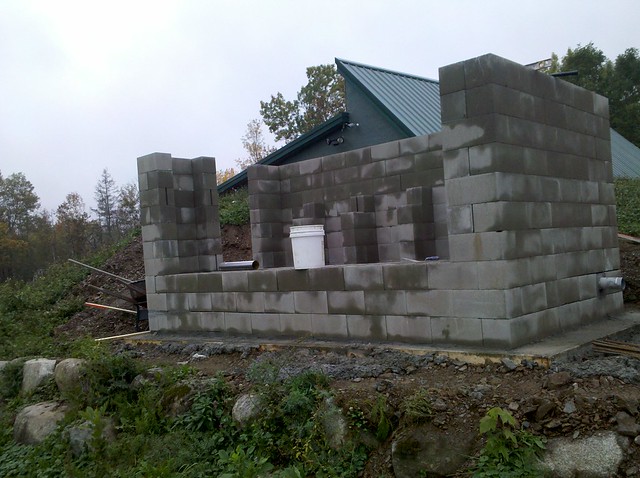
I was ready to start stacking block. The process is quite simple. You stack the blocks. Only thing you want to do is make sure they are level as you go up since not all blocks are the same and there can be little burs and stuff from the production of them. I usually take a roll of coil stock and cut little shims that I can level the blocks with as I work my way around and up.
let the stacking begin!
I decided to place the smoke inlet here.
I mixed up a stiff batch of mortar to fill in the gap around the pipe
and worked late into the night
as I was wrapping up for the night my wife came and checked on me, we were going over the layout and decided the smoke chamber was to big and it was going to create a dead space in the corner
so I chiseled out my smoke inlet and moved it over
I also had to move some of the blocks I had lais the night before
my cold chisel and 1 pound sledge made quick work of that
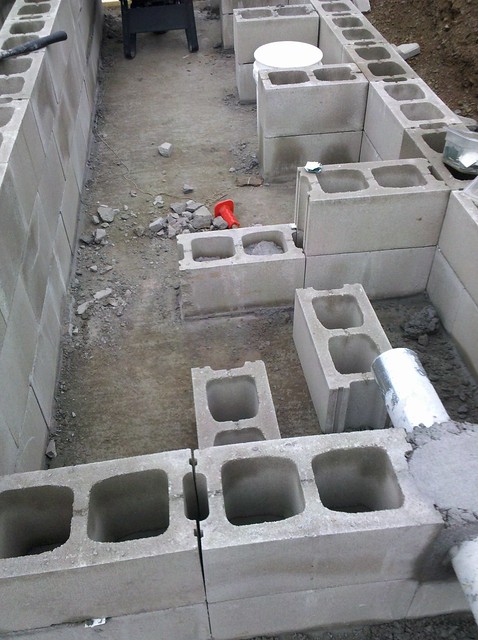
and I relaid the block. It would probably help if I planned this stuff out more
15 Feb ’12
Offline
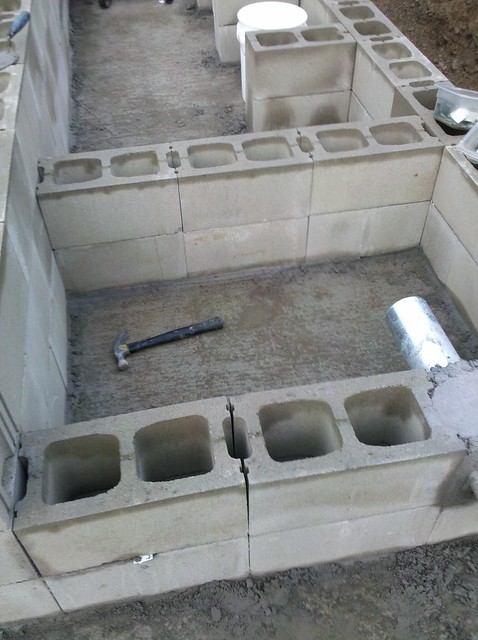
now that I got that taken care of, I started just stacking the block
I continued with the pilasters as I figure I could build shelving between them

the smoke chamber I only went three course high because from there on up it would be a wooden chamber
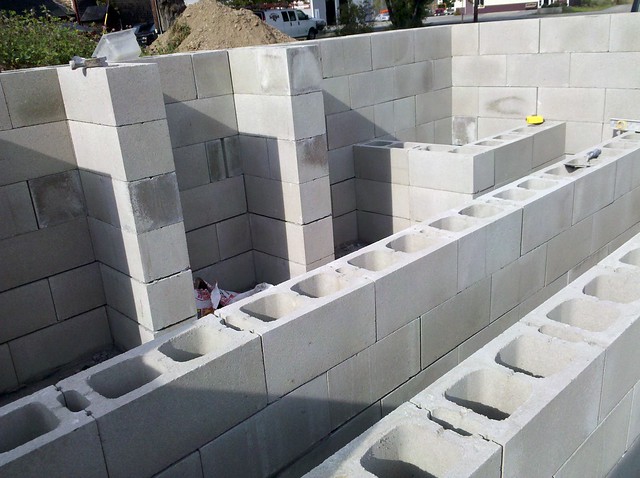
I turned a course by the door on the planter bed for stability
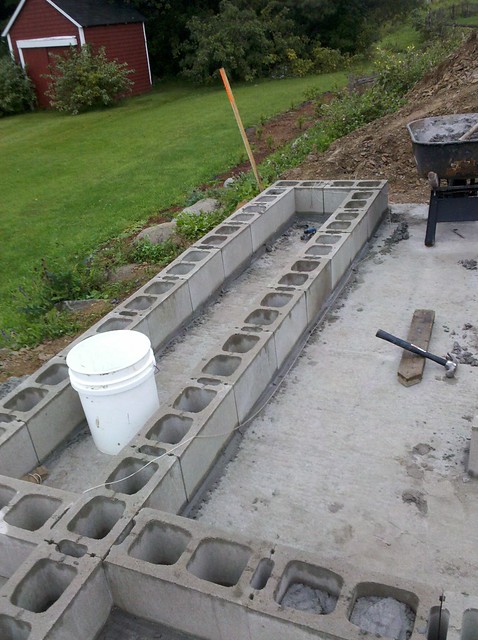
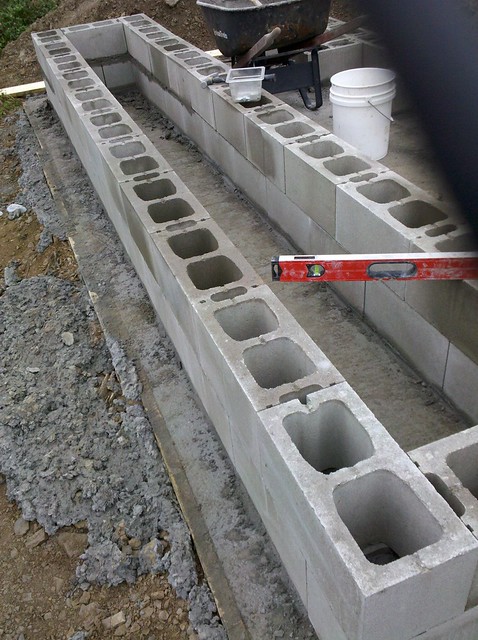
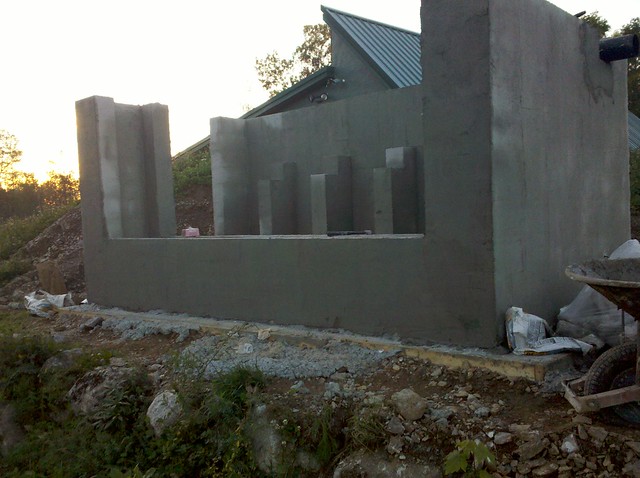
the tenth and final course and the shell is stacked
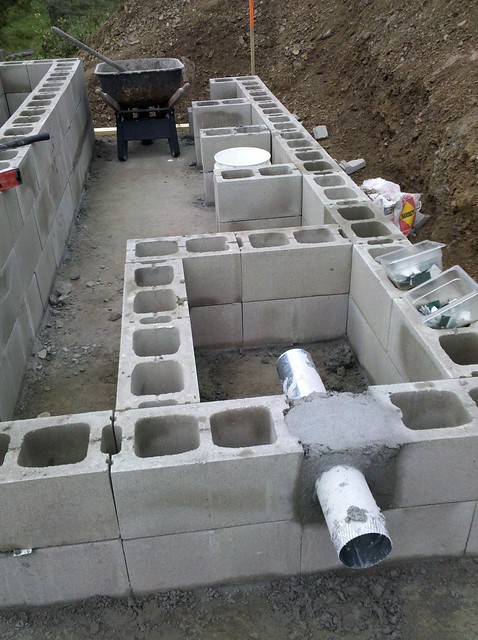
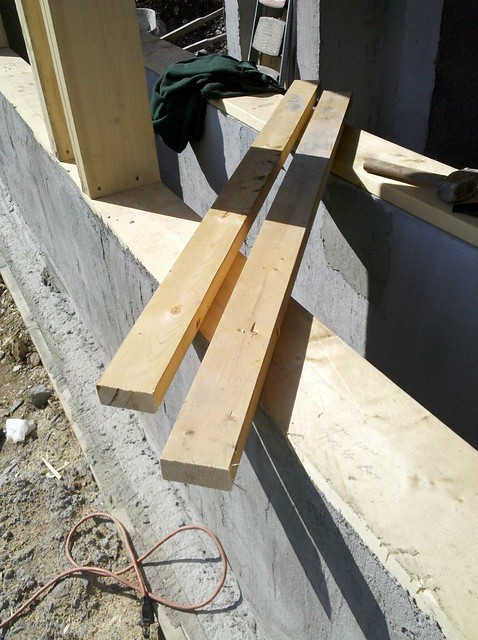
I always try and overbuild so I went and bought some rebar and 30 bags of quikcrete
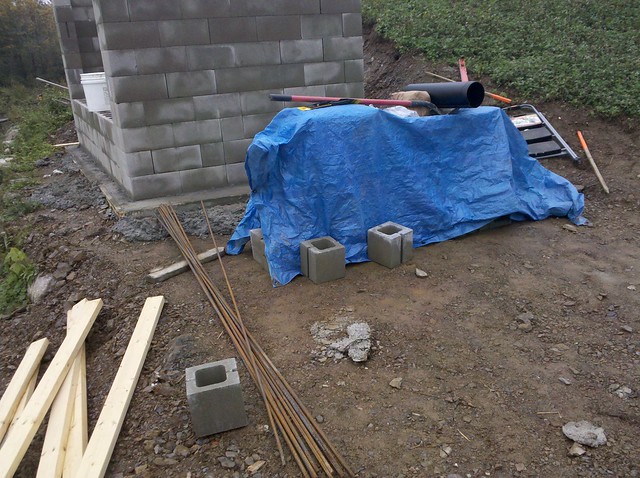
and dropped a rebar at each corner, each side of the doorway and down each pilaster core. I Mixed up the concrete and filled those cores and stuck a anchor bolt in each one so I could secure my sill plate down

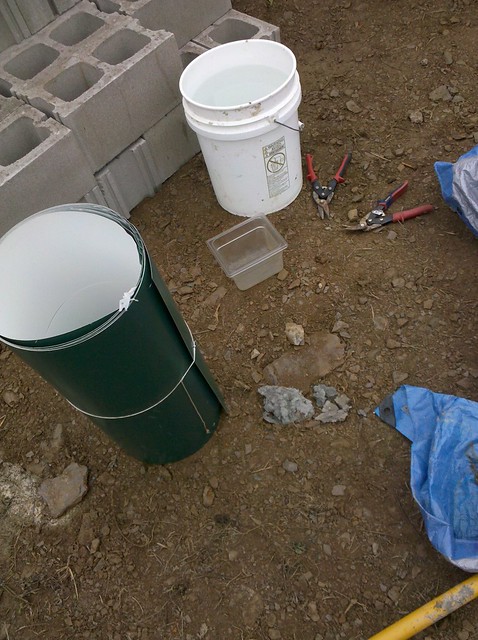
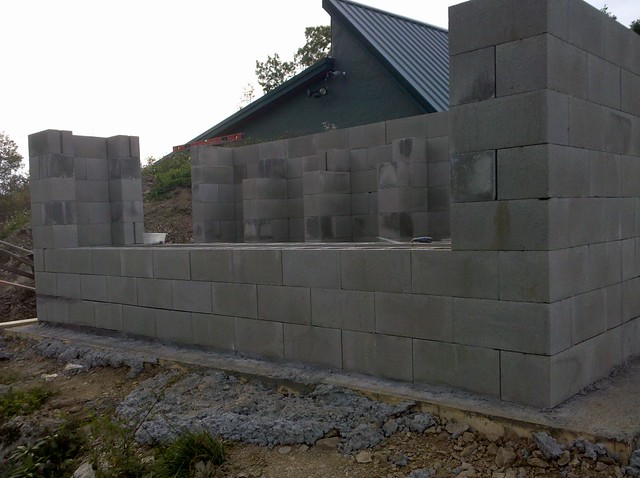
the next day I went and picked my old friend surface bonding cement and assembled the required tools for the job.
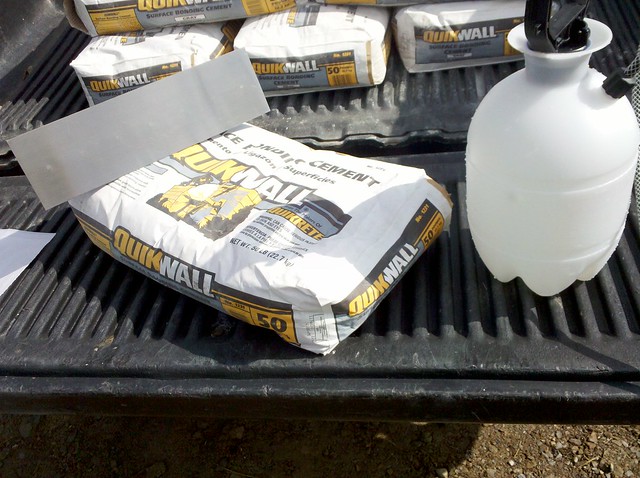
to use the sbc, you first want to make sure you are working in the shade, if you are working in direct sunlight it will dry to fast and you can have cracking. You start by misting the wall with the hand sprayer to keep the blocks from sucking the moisture out of the sbc and causing it to dry to fast
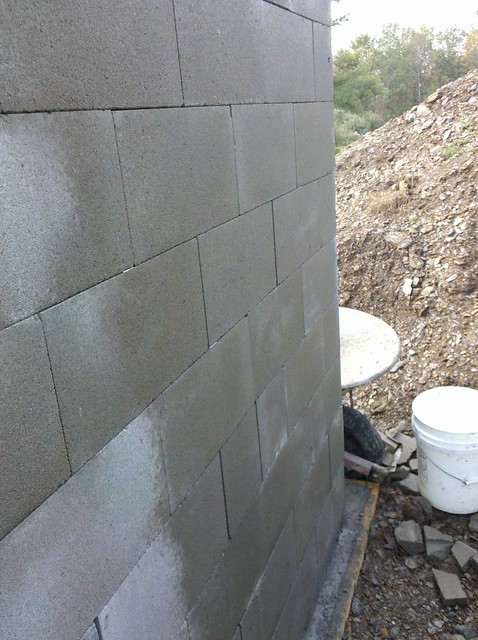
starting at the base of the wall and holding the trowel at a 45 degree angle apply the sbc upwards leaving at least a 1/8 inch thickness.
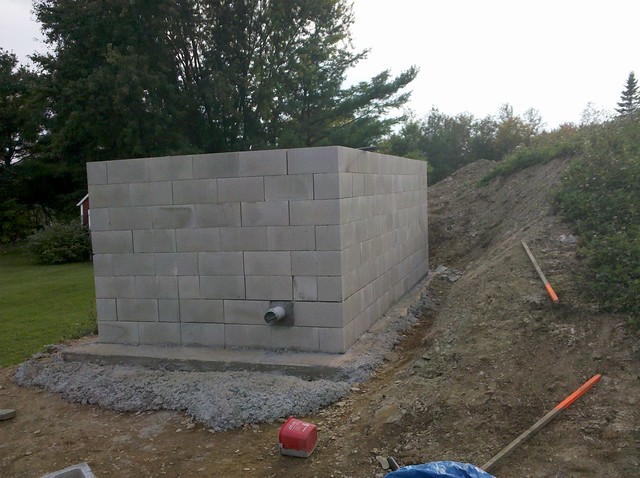
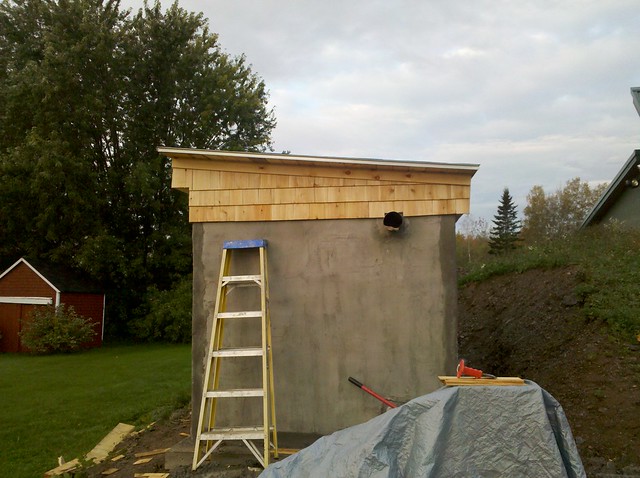
mistake number 47, I had forgotten to put in a exhaust pipe for the smoke chamber, so I cut out a block quick and threw in a 6 inch stove pipe
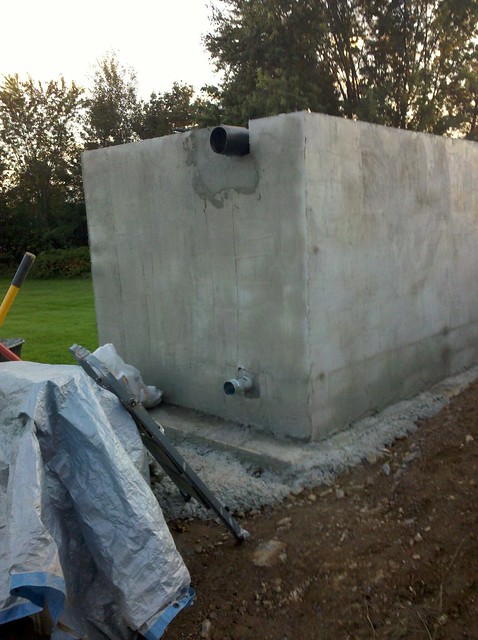
Final exterior coat, you can see how I stepped the pilasters for the top shelving in the back
15 Feb ’12
Offline
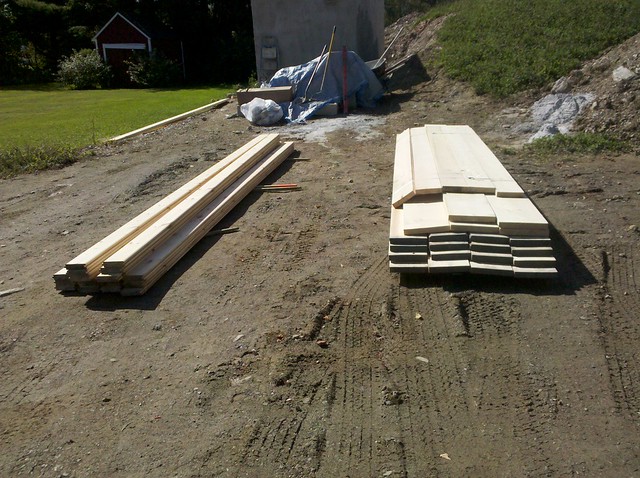
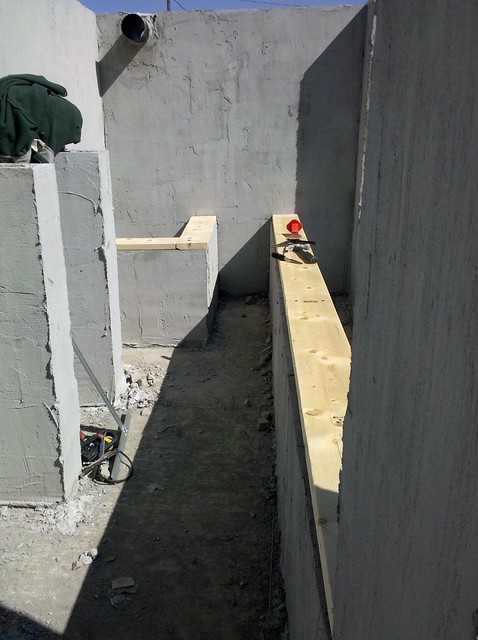
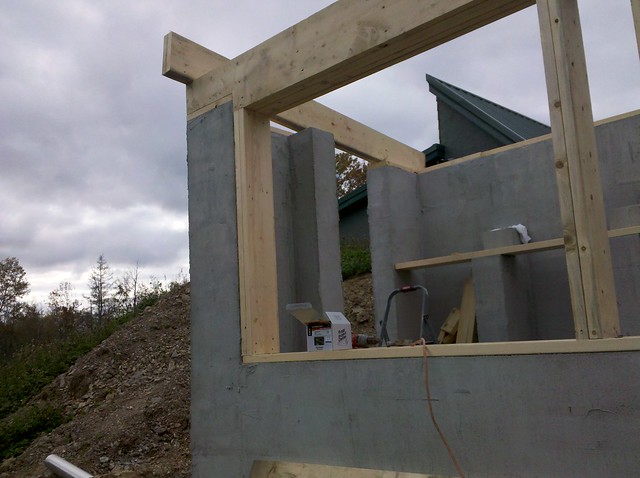
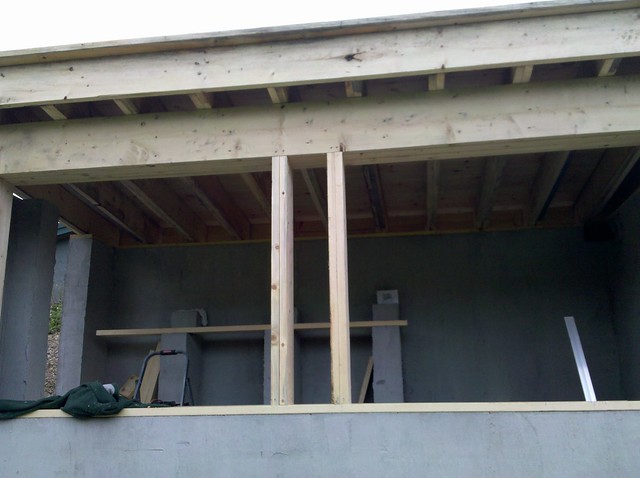
we were debating on how to build the roof. Our choices were to just put on some green metal to match the house or make a earthen roof which was our original goal for our house. After some minor debating we decided to go with the earthen roof. To do that though we would have to beef it up to care the increased weight. So I ordered 2x10's for the rafters, 2x12's for the header over the windows and 2x6 T&G spruce for the roof deck.
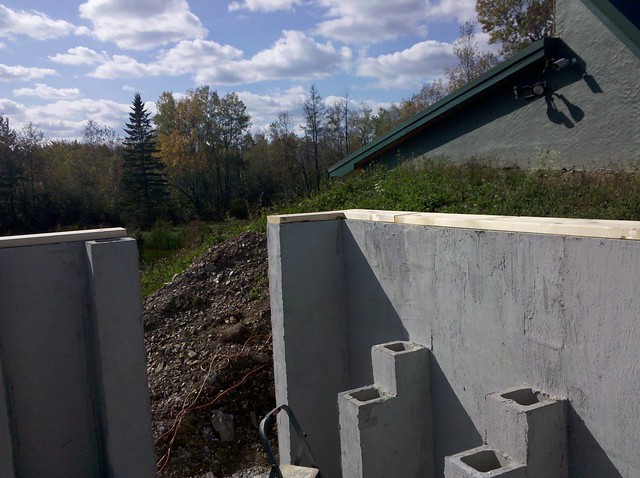
I started by setting my sill plates on top of the blocks.
I took the 2x12's and notched them so they would rest on top of the plates and frame out the proper opening for the windows.
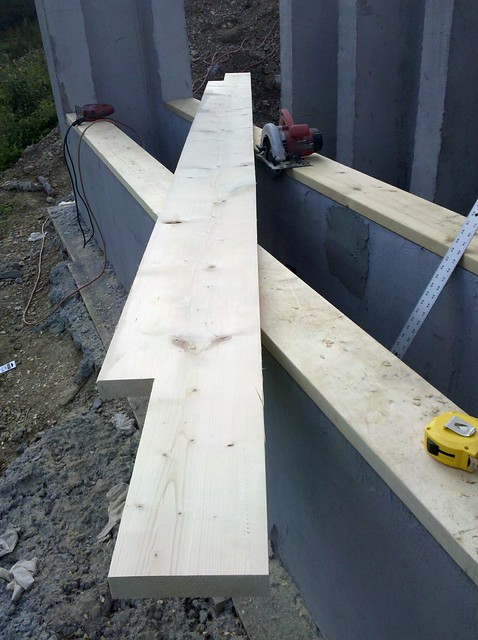
I nailed 5 of them together since they were going to be spanning the 12 foot opening and carrying the weight of the roof.
I cut out studs from 2x6's to break up the span and frame out the windows
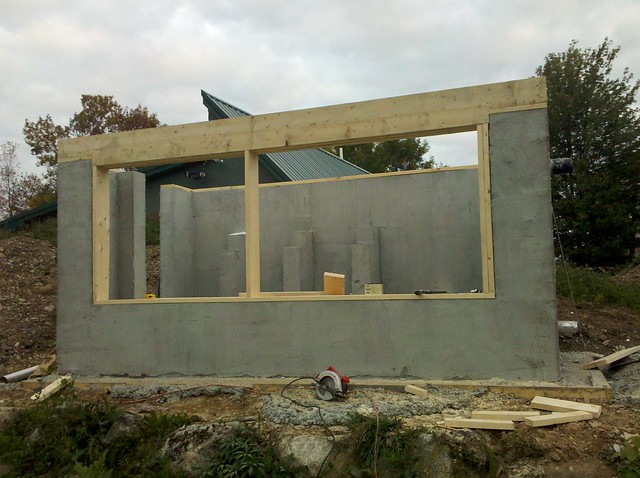
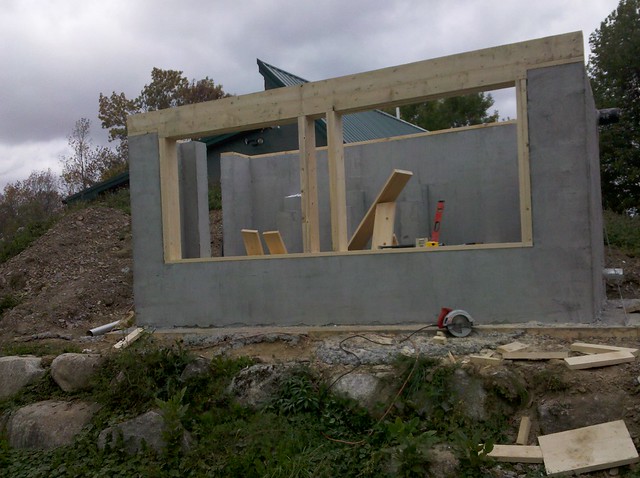
For rafters I doubled up the 2x10's and put them 16 on center
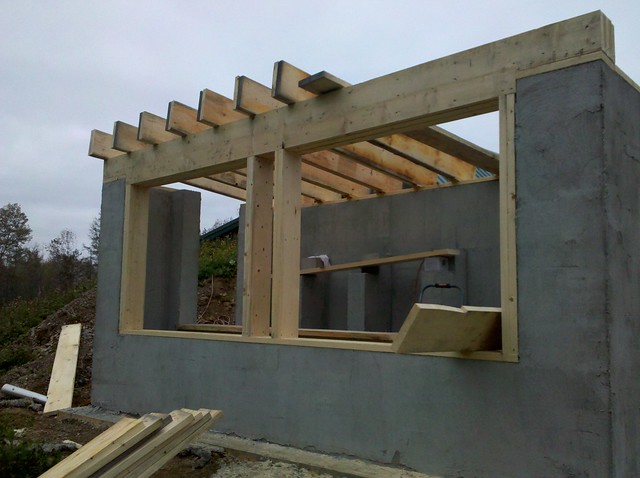
last rafter set
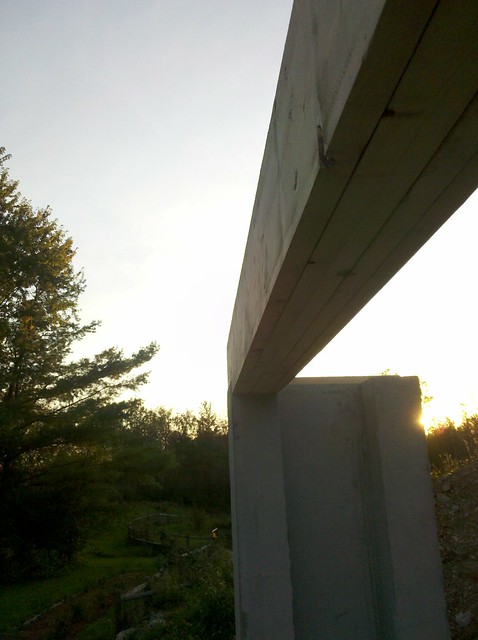
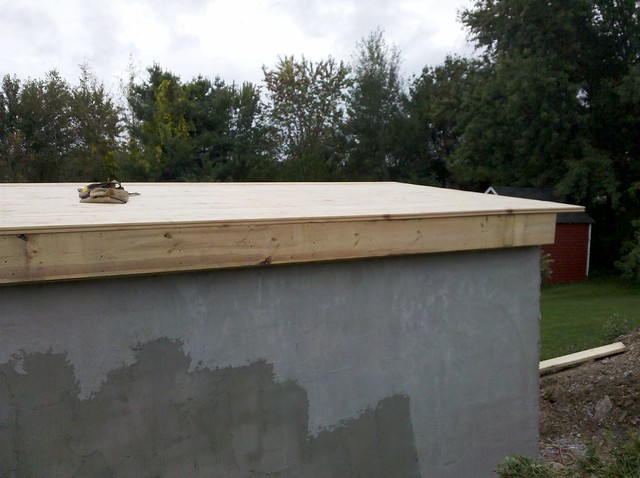
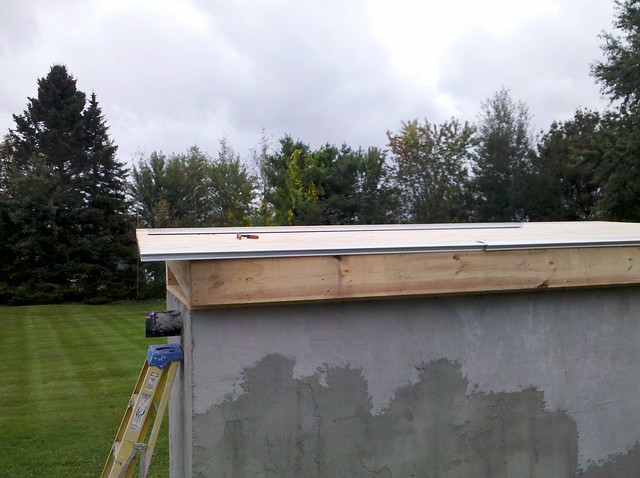
I nailed up a 2x10 for a fascia board across the front.
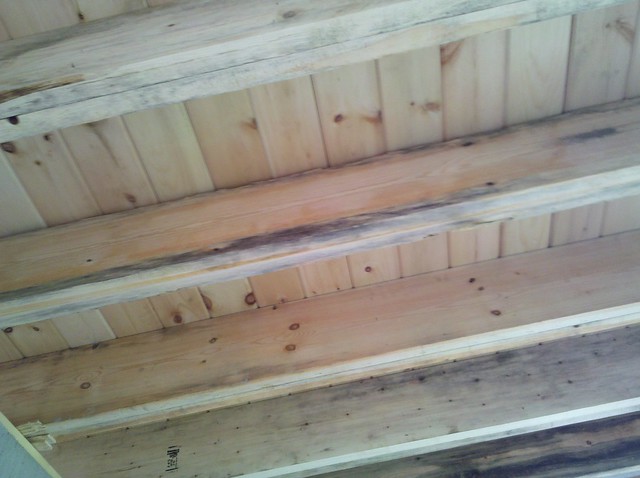
and started nailing down the decking, you can see on the rafter I didn't notch them, I just used shims to make wood to wood contact. For strength purposes I didn't want to cut birdsmouths into the wood.
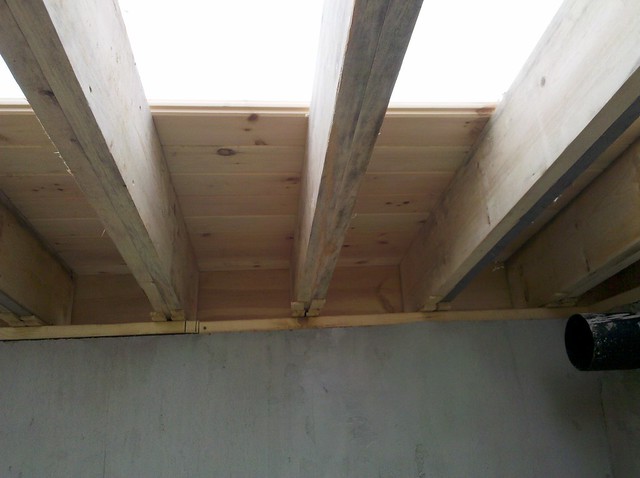
decking all complete
I used a 2x10 on the back as well for a fascia
the t&g decking creates a nice finished look inside the building
15 Feb ’12
Offline
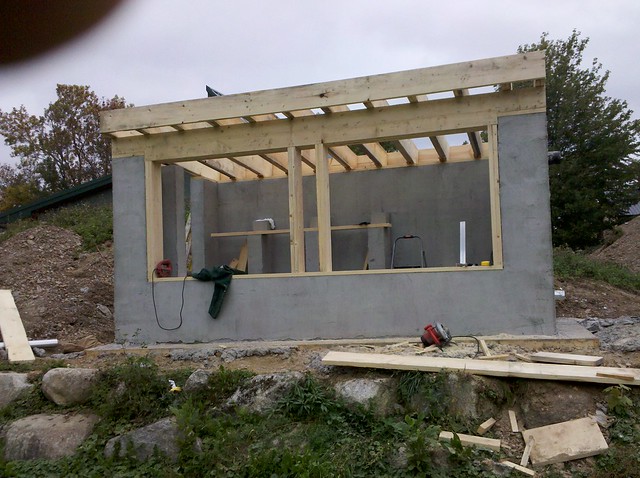
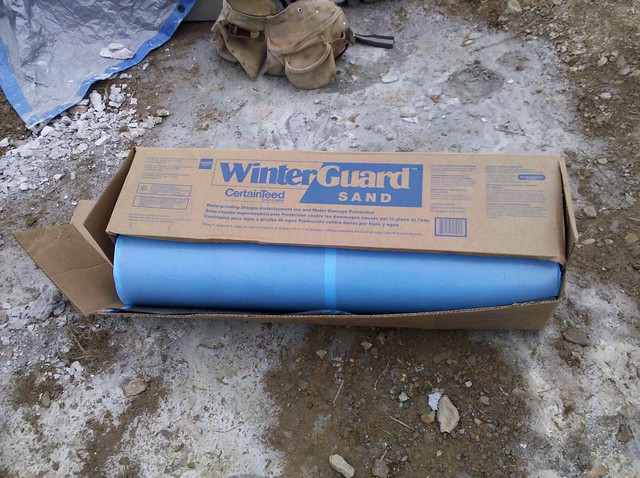
to protect the decking for the time being I went and grabbed a roll of ice and water, this was going to be our base layer for our cold roof
we nailed down drip edge around the perimeter first
and rolled the ice and water overlapping by a good 8 inches since the pitch was so low
it was starting to look like something
I went around and re coated the corners and the base just to make sure there wasn't any paths for water to enter since we were not going to get as detailed as with the house with insulation and foundation guard
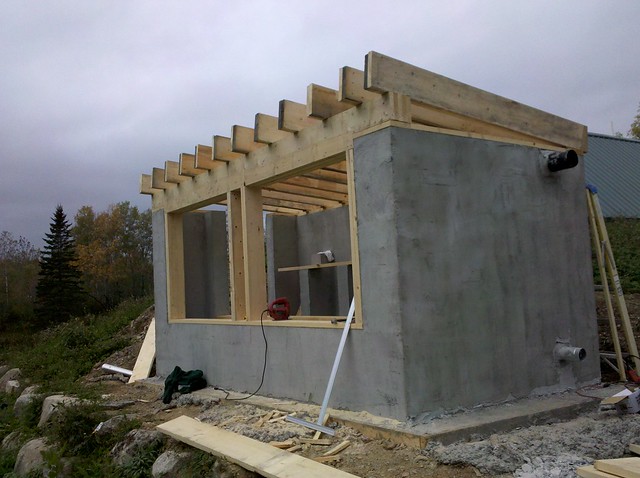
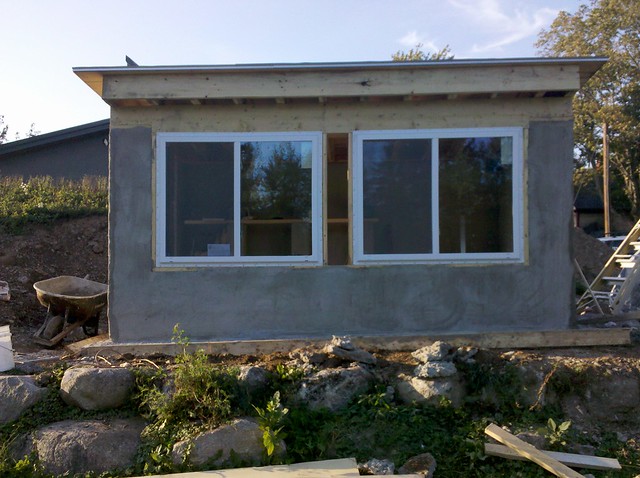
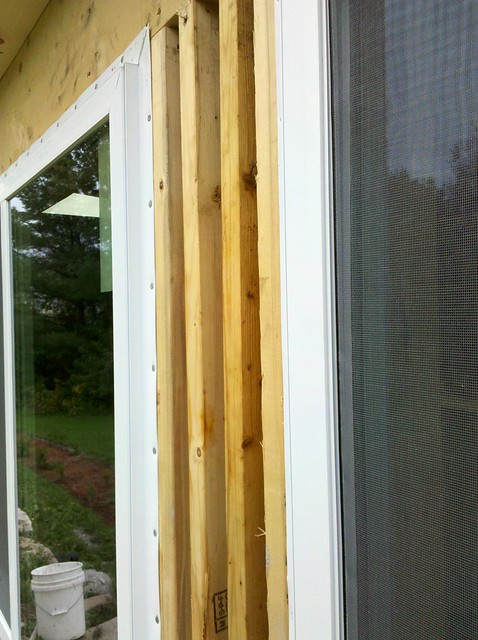
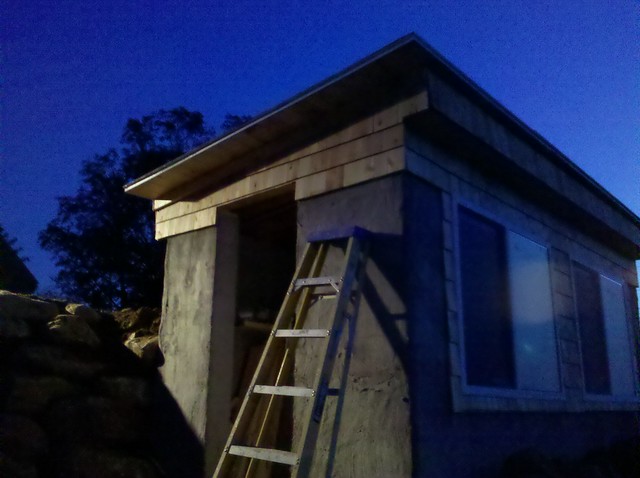
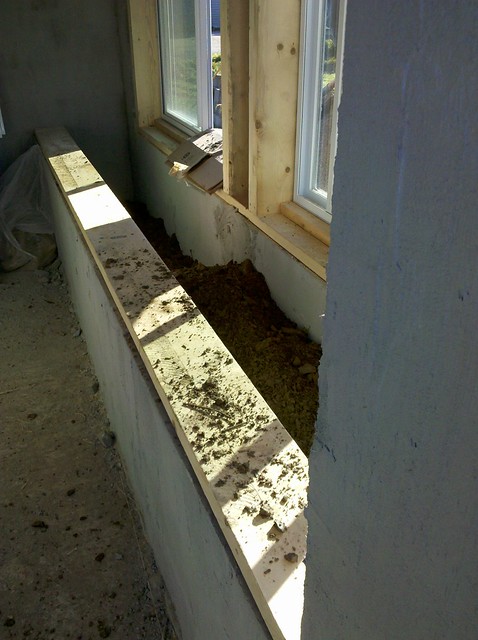
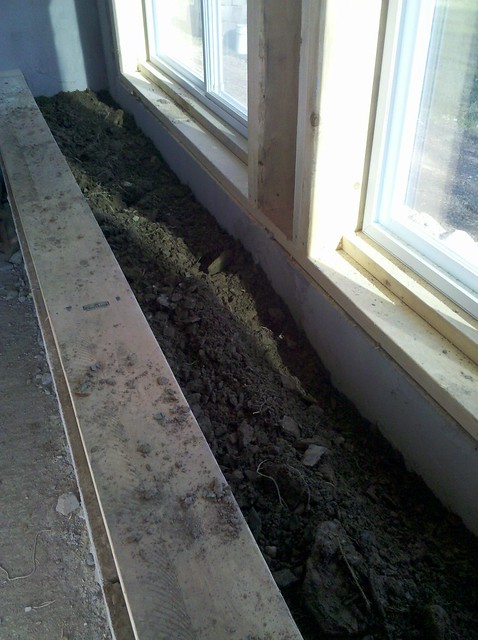
I decided to get the windows installed so I cut some plates to raise them up a little
and popped in the windows
I used a piece of 1x10 to use as a soffit, since it is a cold roof I don't have to worry about venting it
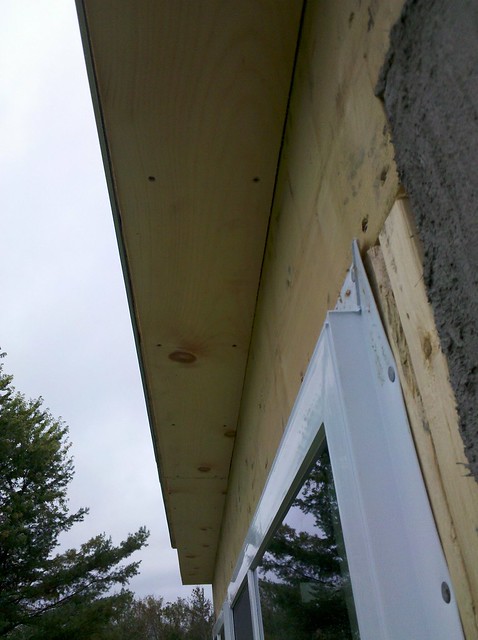
I popped in some more 2x4's to just give me some surface are my nails
15 Feb ’12
Offline
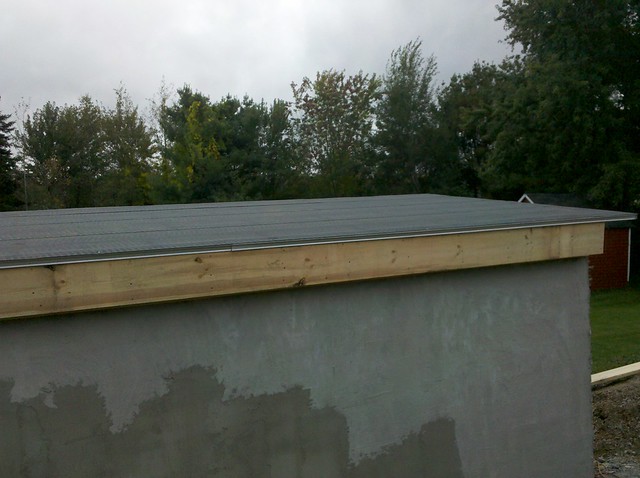
There is a local guy who has a shingle mill so I went over and bought a square to finish off the outside of the building
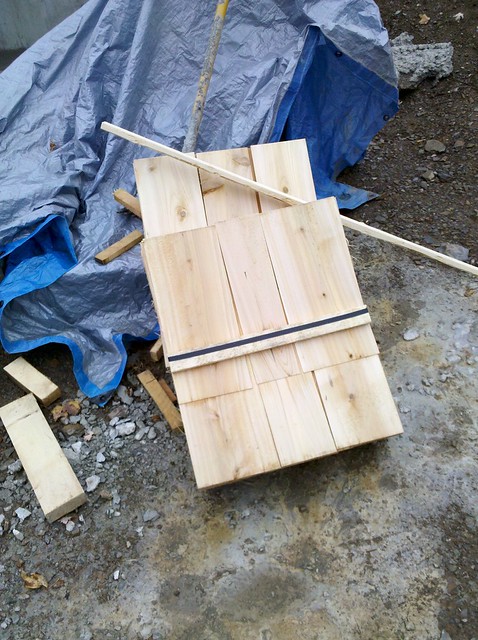
I chose a 6 inch reveal for the shingles and just started working my way up
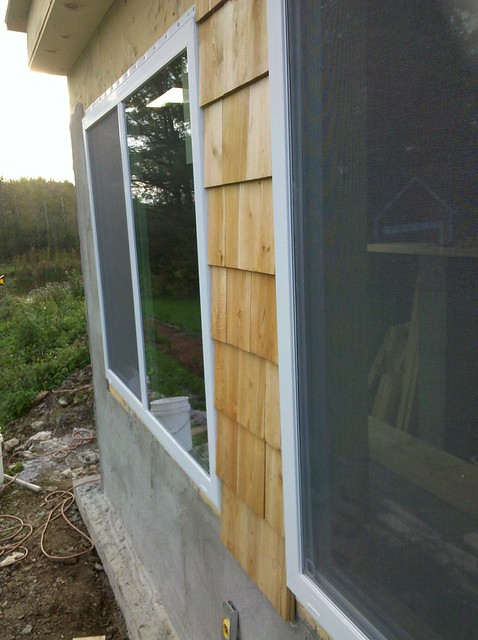
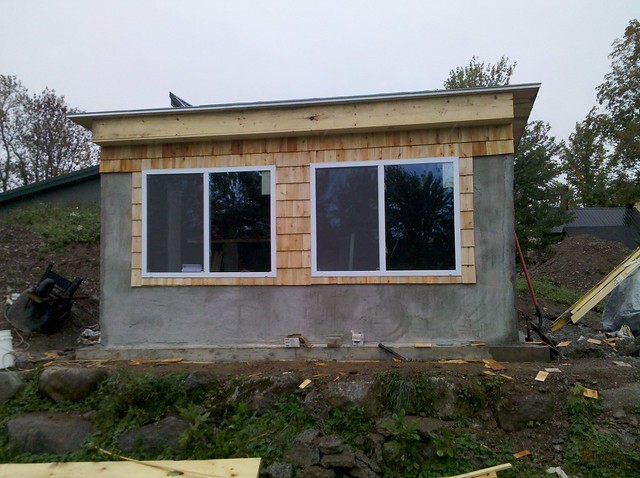
The hardest part was just cutting around the exhaust pipe and the angle of the roof

I used just a 1x3 to trim off the top of the shingles
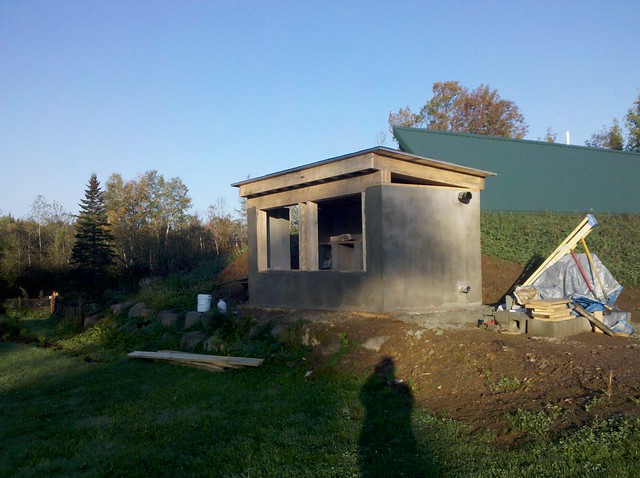
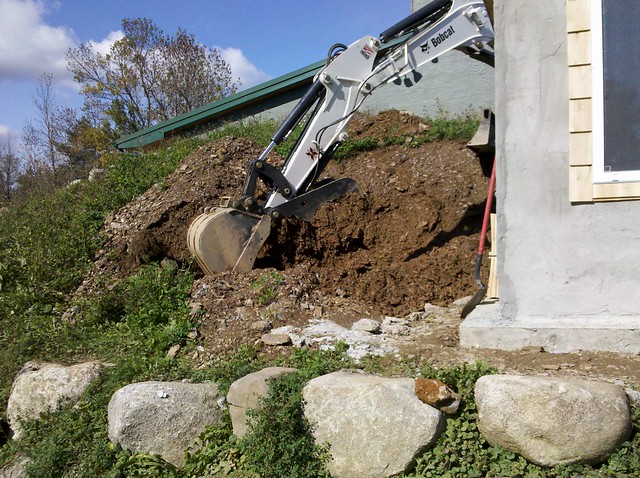
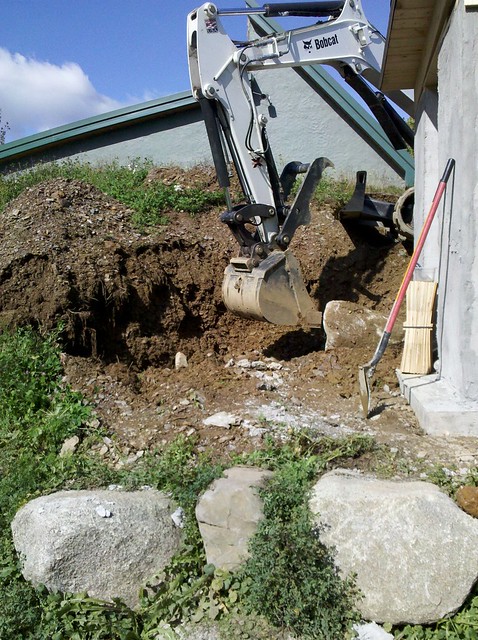
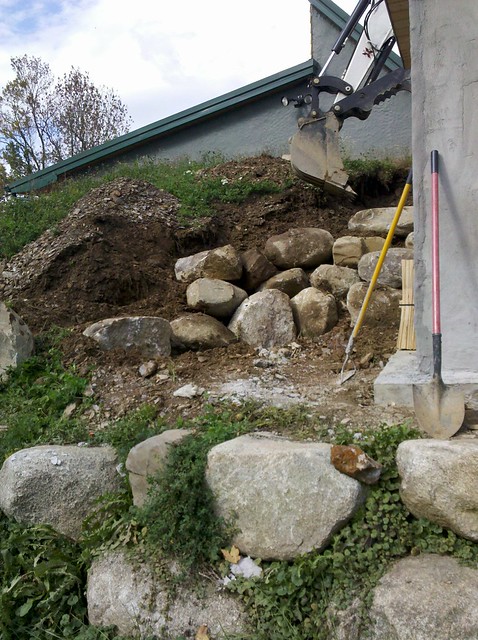
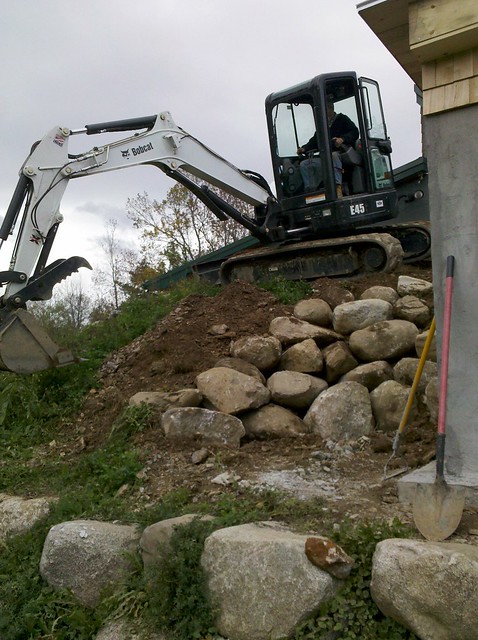
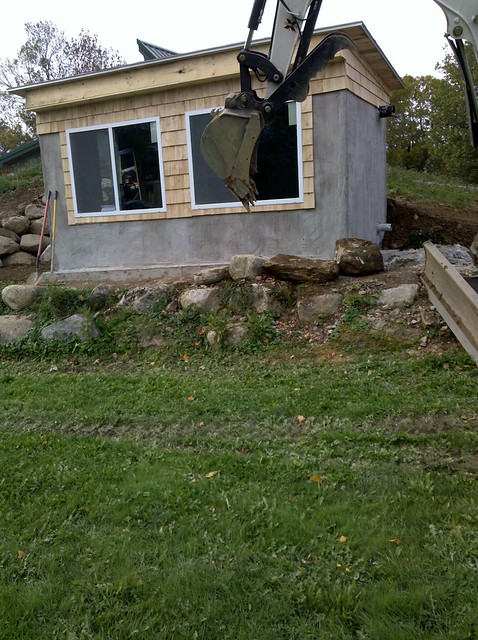
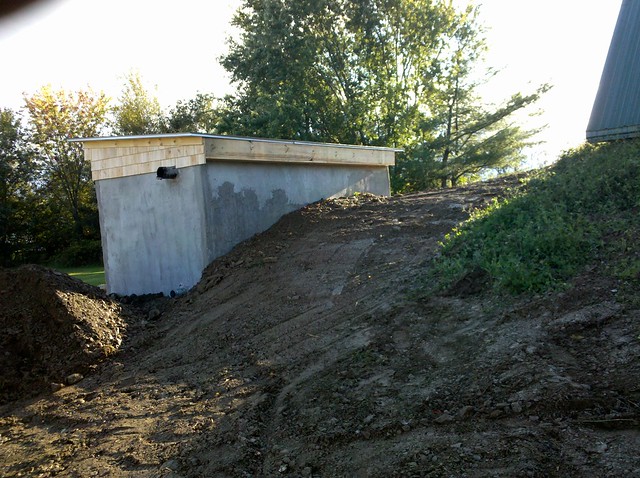
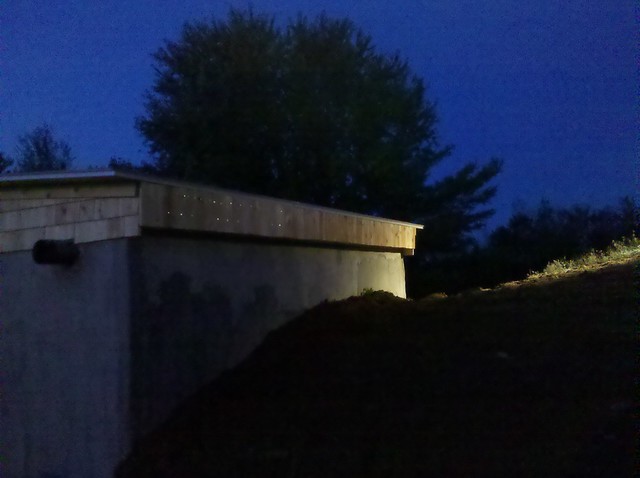
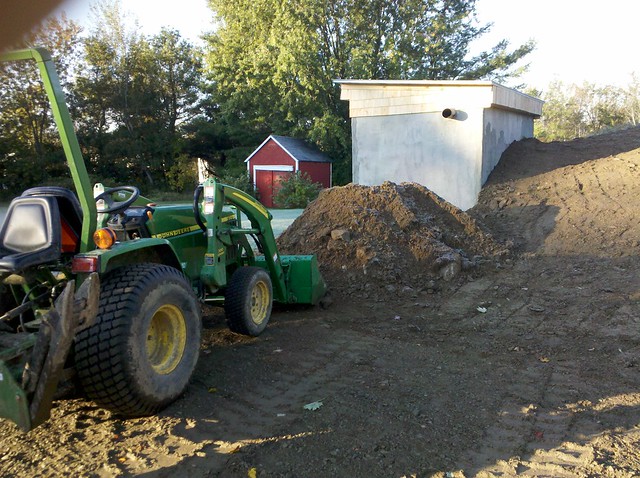
I figured at this point it was time to back fill so I called the excavator back,
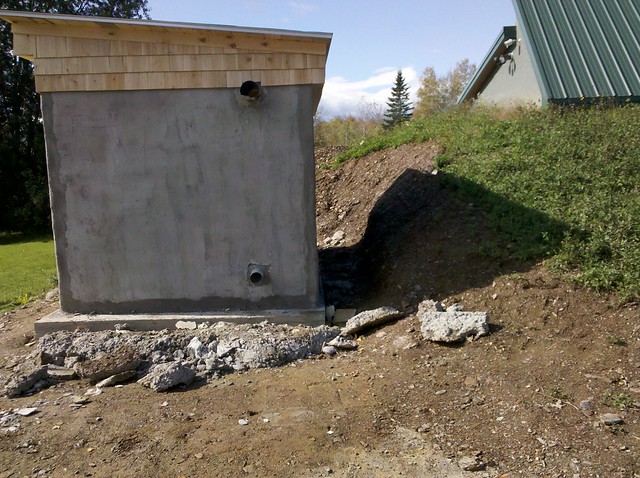
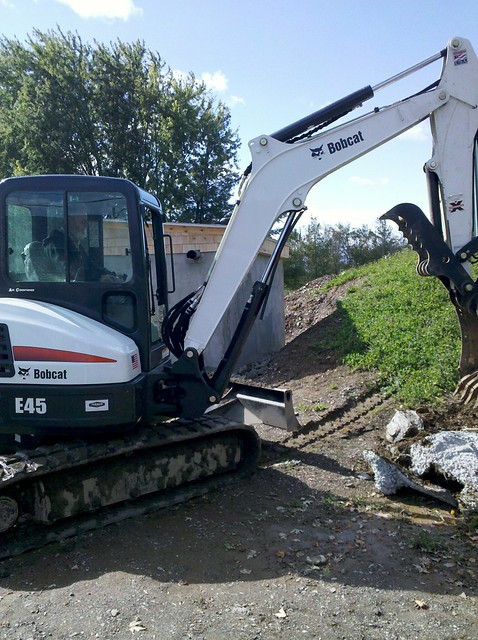
he brought back a mini cat so he could get up on the berm to work
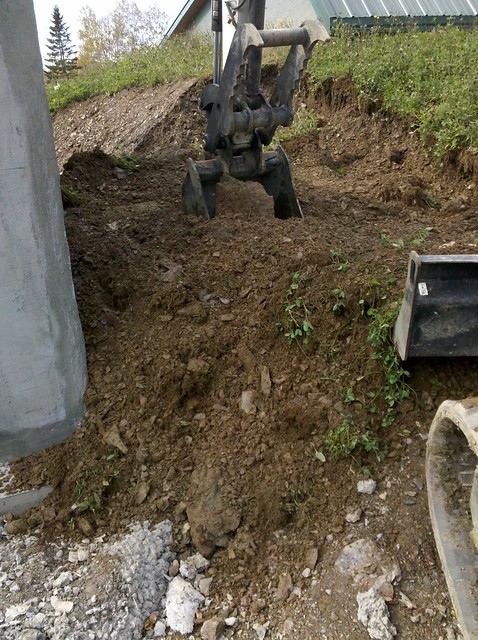
he started by digging out the berm to create a level working area, I was getting nervous at this point
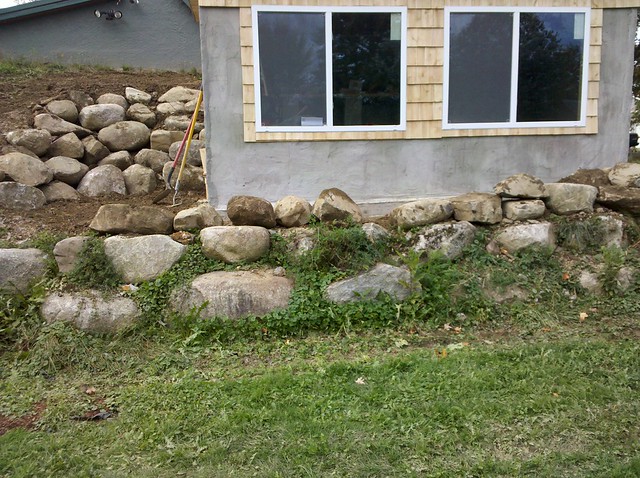
they dropped of some fill to add to what was excavated prior
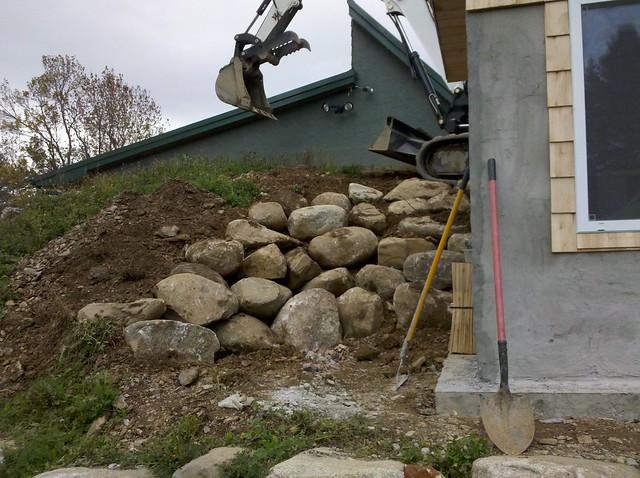
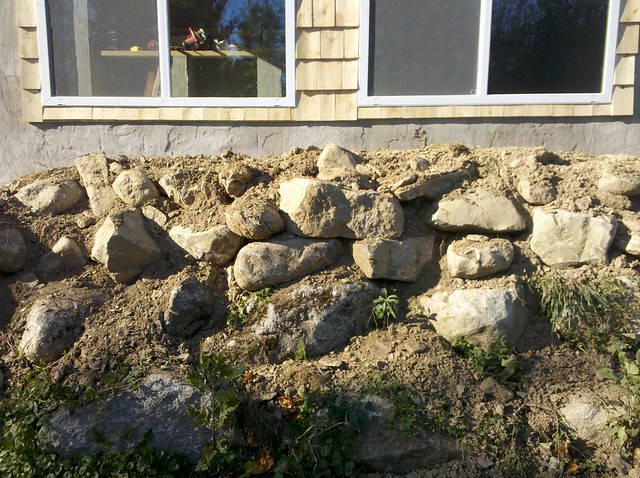
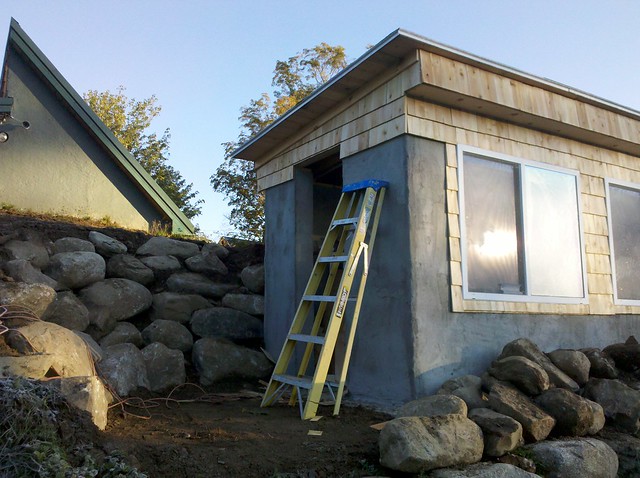
we decided to dig out around the front entry and build a boulder retaining wall to match the front of the house
it's amazing what a good operator could do, he was basically building this blind from behind the building

15 Feb ’12
Offline
then I really got nervous, I guess he knows his limits with the machine better than I do
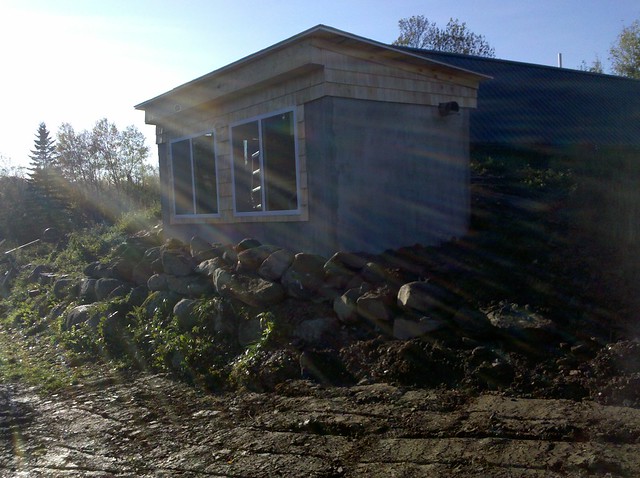
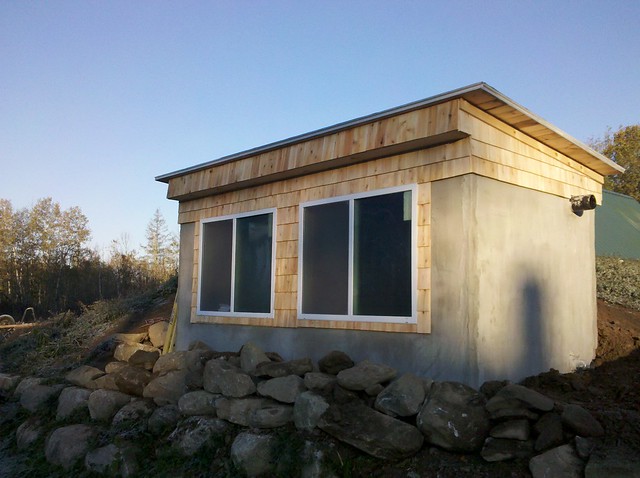
retaining wall all done, now just needs to be seeded
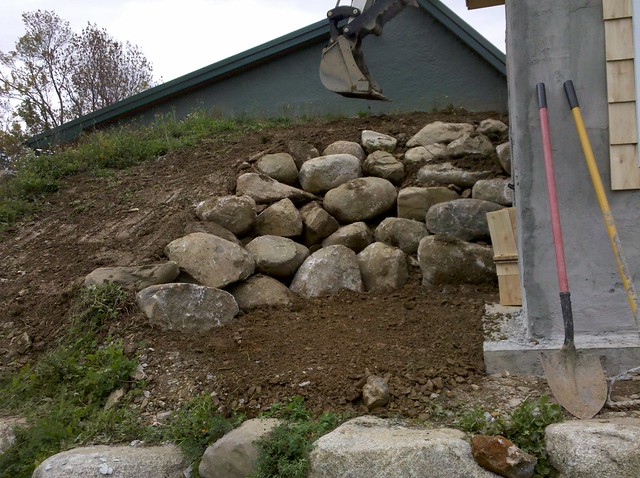
he started smoothing out the hill
and with the extra rocks we placed in front
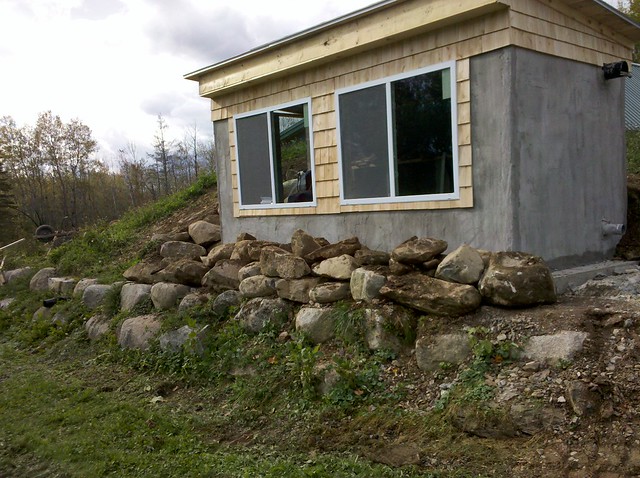
all complete, I figure I can transplant some of our strawberry runners here this summer
I had them drop off a extra load of fill so I could fill the planters
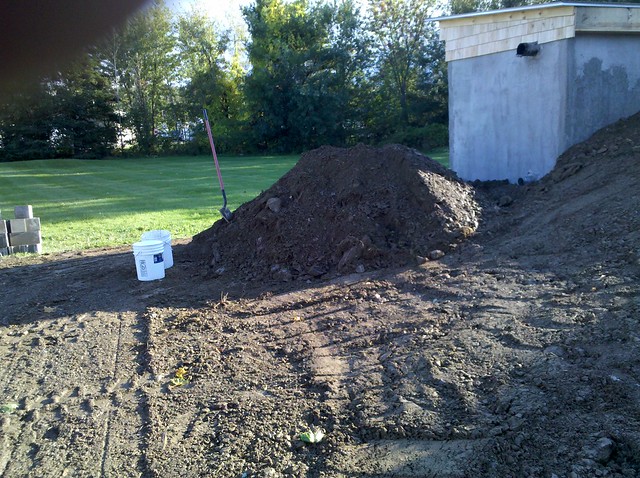
it was starting to come together
I decided to throw some cedar on the fascia board to finish it off

looked better in the daylight the next morning
I had my friend bring his tractor down to move the fill for the beds
we just shoveled it through the window
I will finish them off with some planting soil


Most Users Ever Online: 698
Currently Online:
47 Guest(s)
Currently Browsing this Page:
1 Guest(s)
Top Posters:
easytapper: 2149
DangerDuke: 2030
groinkick: 1667
PorkChopsMmm: 1515
Gravel Road: 1455
Newest Members:
KarenAdaro
colevarela8606
winniearanda972
carsonmilligan
jettasex8138
Forum Stats:
Groups: 1
Forums: 12
Topics: 11478
Posts: 58673
Member Stats:
Guest Posters: 2
Members: 3534
Moderators: 0
Admins: 1
Administrators: K

