
Have you ever heard of a Keyhole Garden? I first heard about it several years ago and the idea intrigued me. Instead of explaining it, I will defer to appropedia.
[quote_box_center]
A Keyhole Garden is a type of kitchen garden raised bed. The design – which looks like a keyhole from above – incorporates a central ‘basket’ where compostable waste is placed and greywater is poured. They have many different forms, and are especially useful in areas where good soil is scarce. They extend the growing season and supplement diets with added nutrition. The garden survives floods well and grows well in arid or rocky conditions as the raised bed holds moisture due to the high level of compost/humus in the garden.
The charity, Send a Cow, trains African groups in how to make them as part of their sustainable agriculture training.
[/quote_box_center]
One of our forum members who is trying to work towards a self-sufficient life decided to make a go at it; he did an outstanding job with it.
Hi guys,
I’ve been lurking a bit lately, but wanted to show a project called a Keyhole Garden. The concept is to build the garden so that you can have easy access to all areas of the garden without moving around too much. Efficiency is the name of the game here.
There are versions of the keyhole garden that include a “compost tower” in the middle, with soil built up to the sides of the tower, sloping down. This concept is to compost in-place, when you dump your food scraps etc into the middle, and also to manage water flow, watering from the top of the slope, then building micro-climates of plants to take advantage of the different elevations and exposures. This version isn’t what I was after.
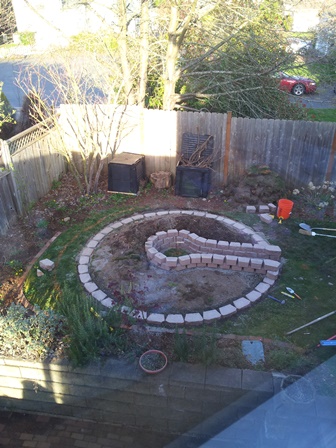
My goal was to build a garden that looked great, but would also allow me to grow the flowers for my wedding in year 1, but convert it to a vegetable garden going forward. One criteria was that it had to have an aesthetic quality, or my fiancee wouldn’t go for it. For this reason, we chose Wellington style landscaping bricks.
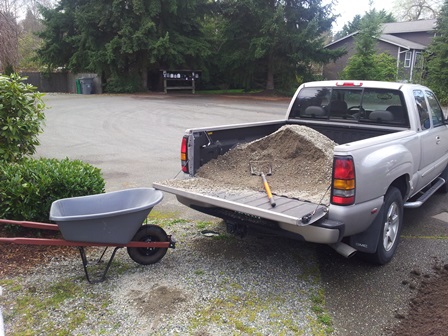
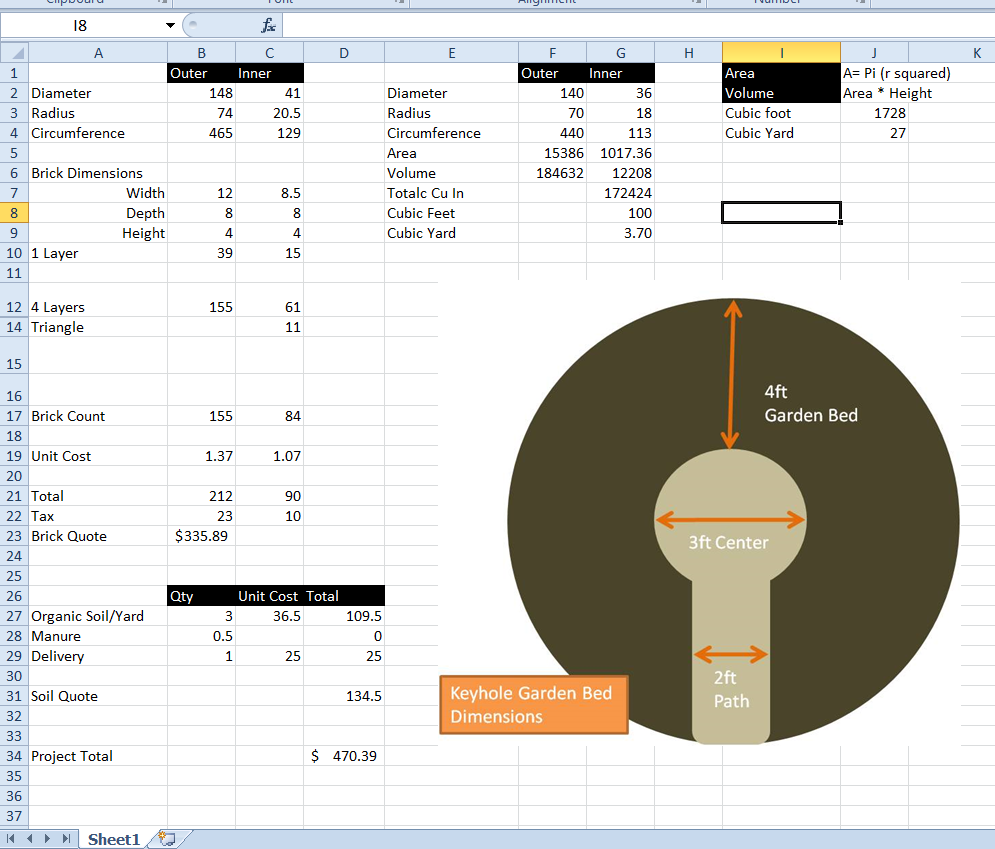
I’ve included the spreadsheet that I used to plan the materials purchases. This isn’t the cheapest way to do this, but I’m in a 1/4 acre suburb lot, and don’t have field stones or lots of logs/trees hanging around. I do, however, have a strong back and a pickup truck.
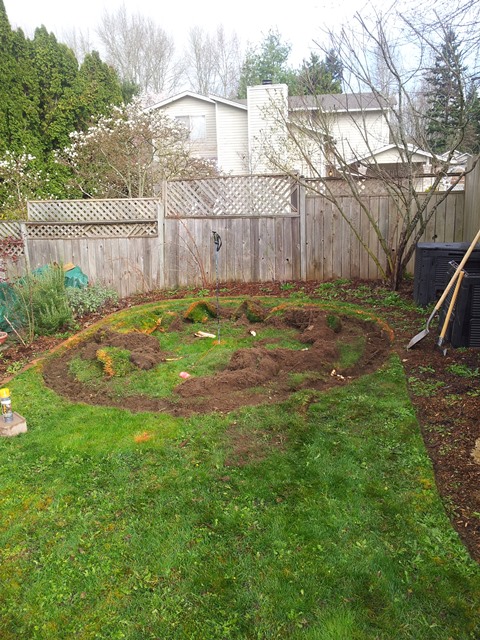
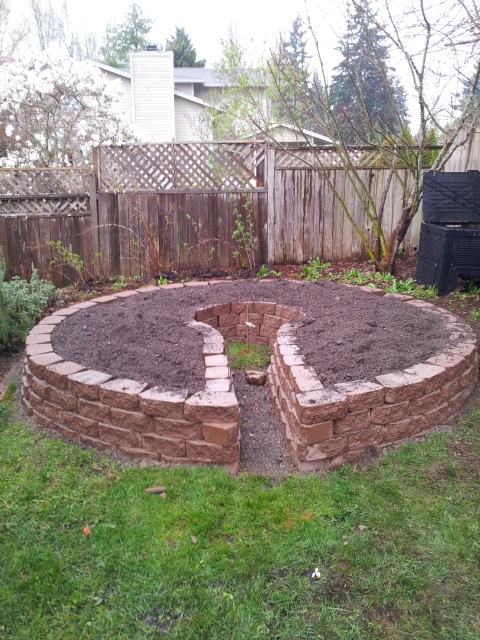
Step 1 – Basic excavation. Measured the 12′ circle by planting a post in the center, and going around it with a twine and can of paint. Then used a spade to clear the sod. At this point, I should have cleared all of the sod, but I’ll get into that later.
Step 2 – Gravel foundation – at least 4′ deep all around 5/8′ gravel. Take your time here, as having a good, deep foundation will make leveling the brick flights much easier.
Step 3 – First flight of bricks. – this is the most important flight, and will dictate the structural integrity and level-ness of your walls for the rest of the flights.
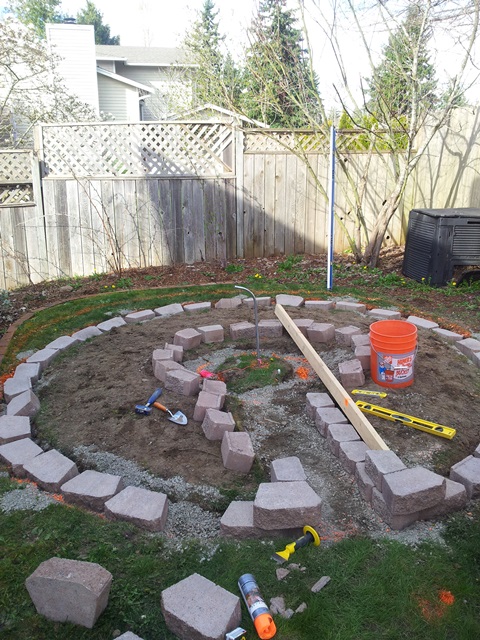
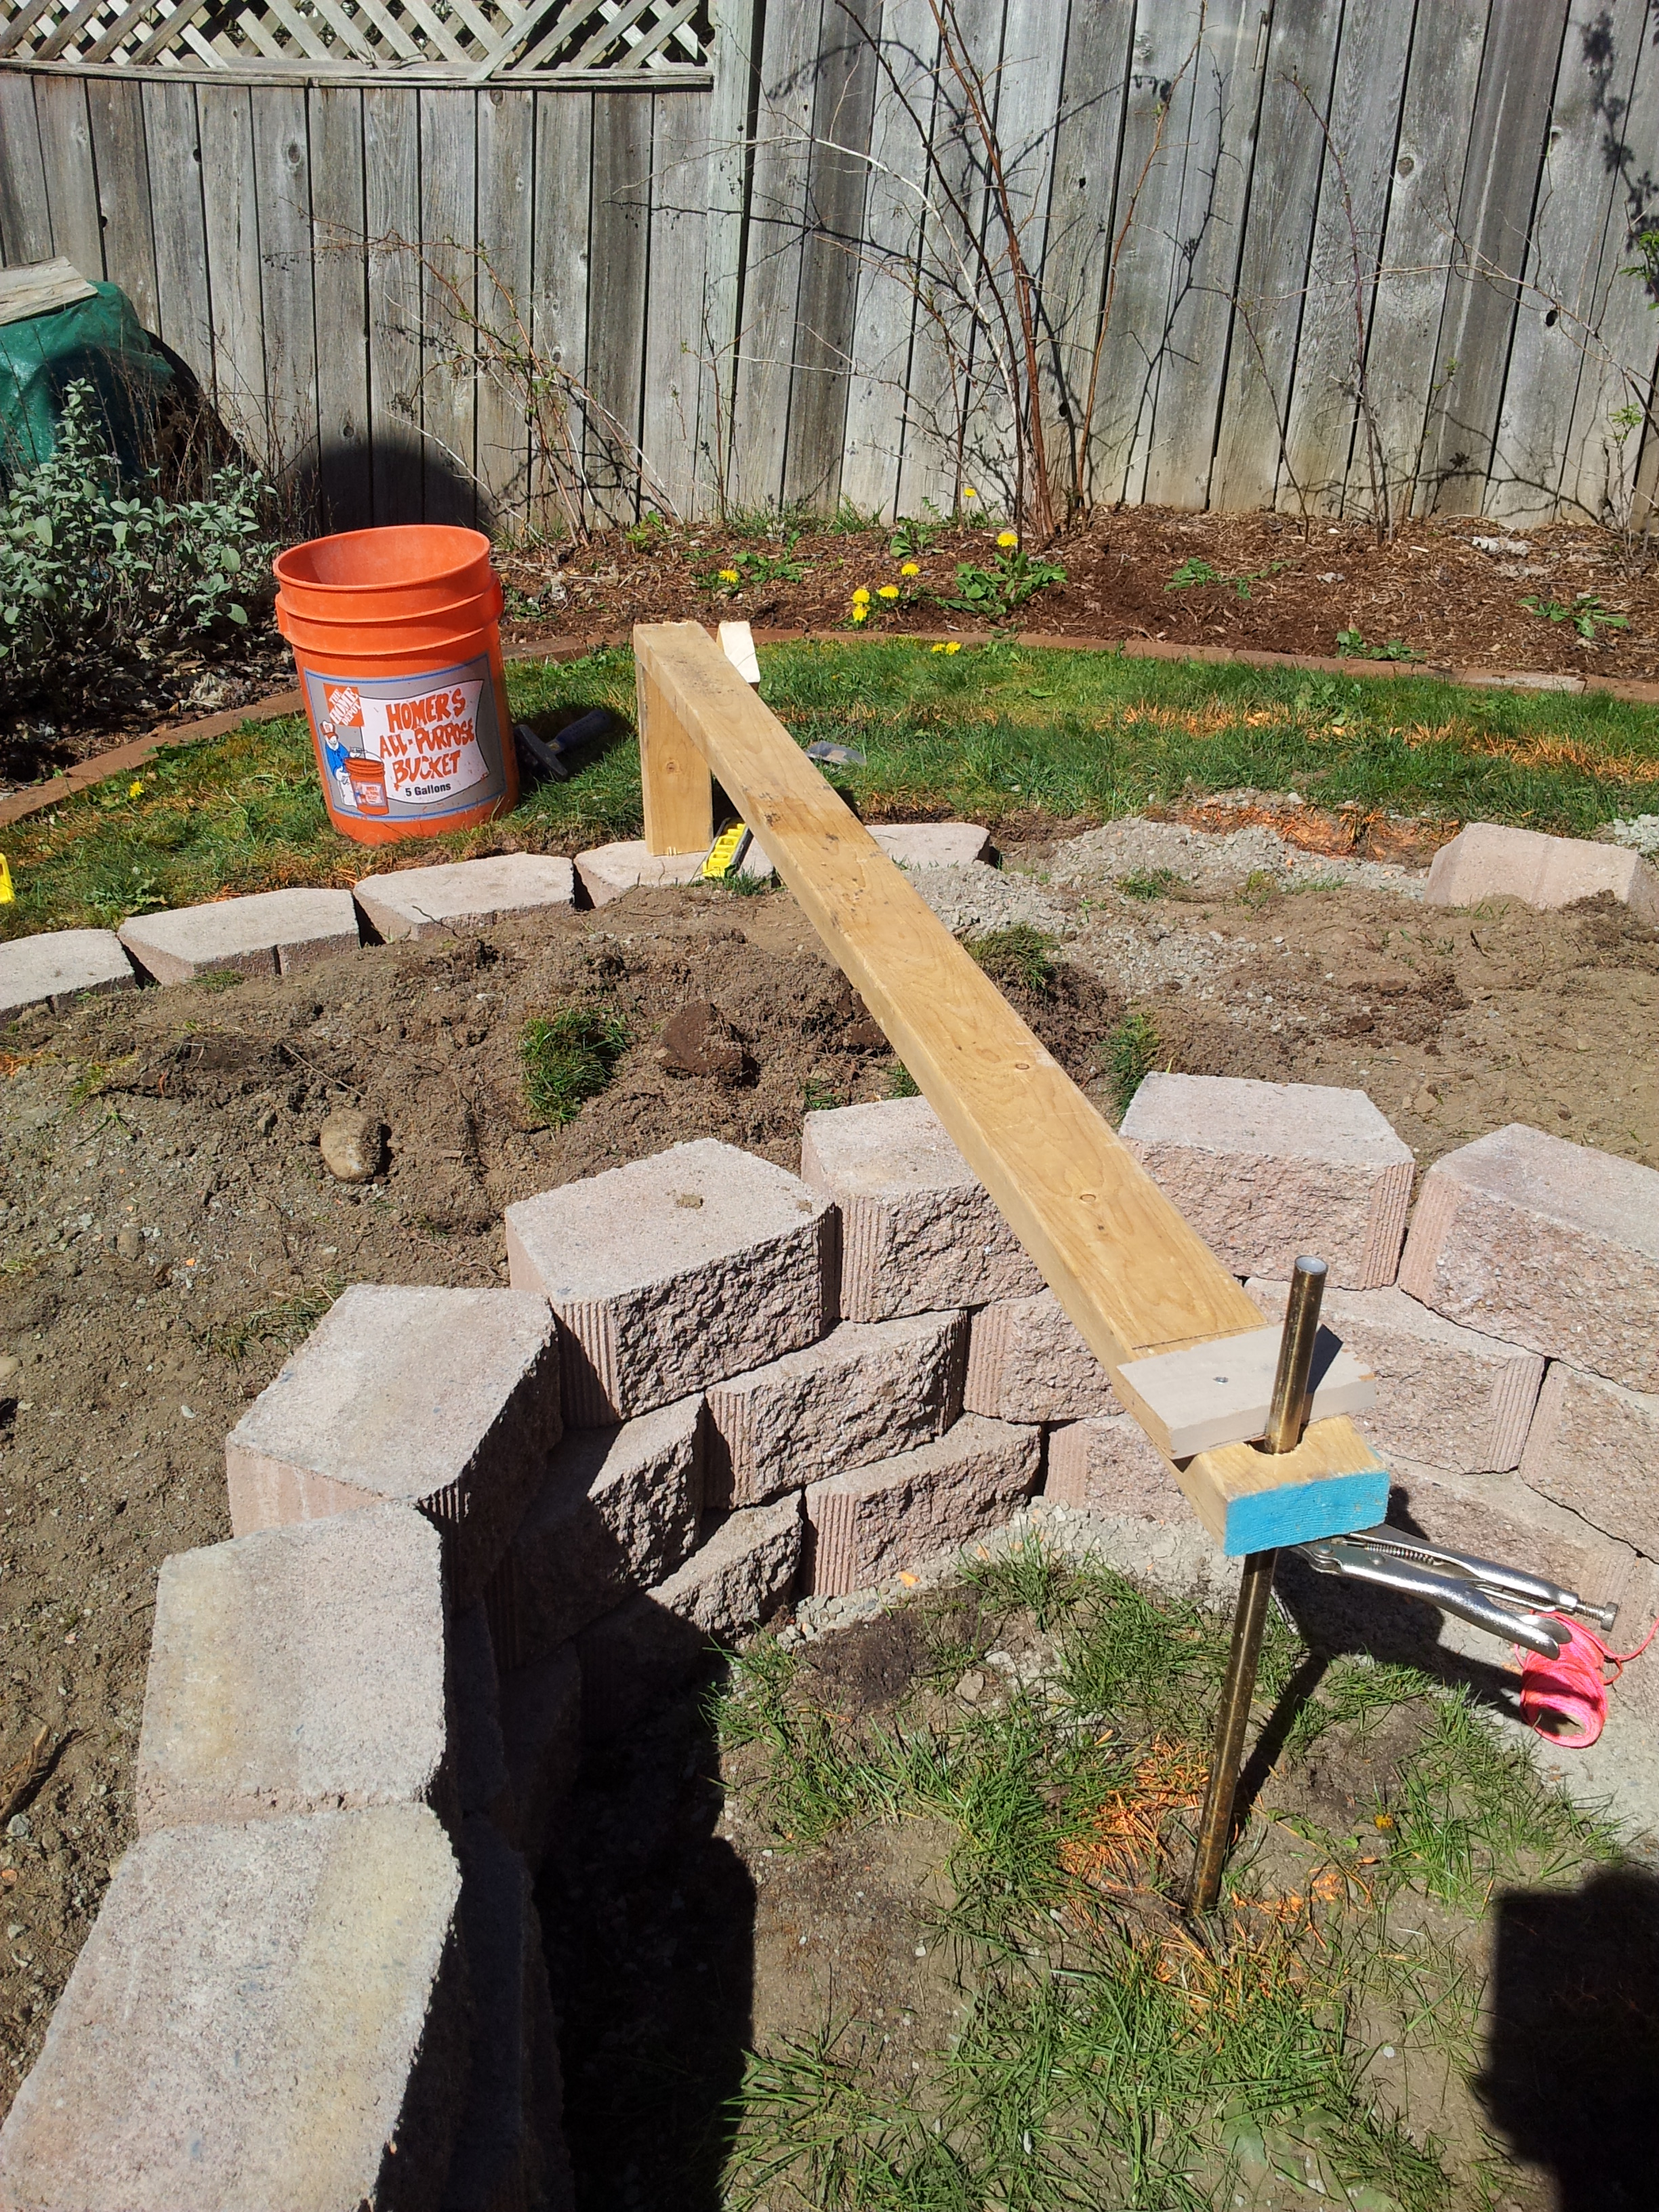
Step 4 – The Jig. To make this circle shape more precise, I crafted a jig from a 2×4. It started with a stake (or curtain rod in my case) pounded firmly into the exact center. Then I drilled a hole in one end of the 2×4 for the curtain rod to fit into. After that, I created a very rough 90° turn at 6′ on the far end, with a scrap to support it. I wanted it elevated to eliminate dragging the length of the 2×4 in the dirt.
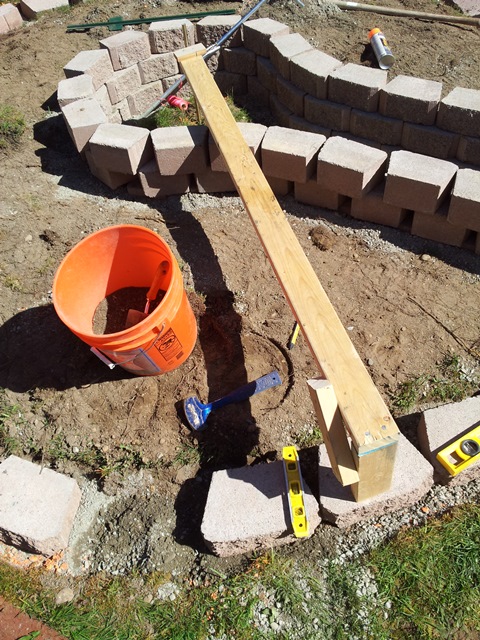
This jig allowed me to move from stone to stone very easily measure the exact distance from center.
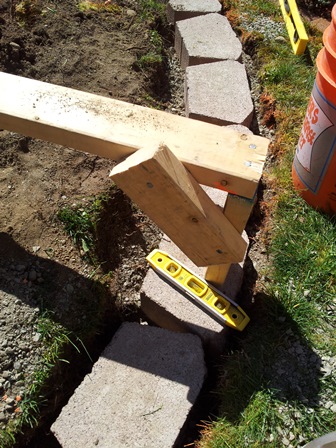
I would place the stone on the gravel foundation, measure the position with the jig, and the level with a combo of my speed level and a longer level.
As it turned out, this was a very precise way to measure. When I went to measure the final stone placement, it was EXACTLY level with the first stone that I placed. This was a true moment of victory for me. If that final stone wasn’t level with the first, I would have had to adjust most of the stones all over again.
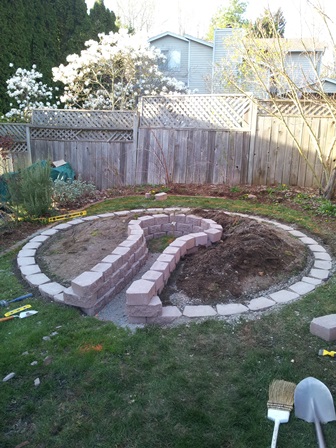
Step 5 – Add stones to the structure in flights. This is the easy part, and it’s pretty much smooth sailing from here on out.
Step 6 – fill with garden soil.
I know this isn’t the most advanced project, but all of my research on keyhole gardening makes me optimistic that this will be a productive way to garden for a very long time.
Here are the basic calculations. The image in the spreadsheet wasn’t the measurements I used, it’s just for a visual reference.
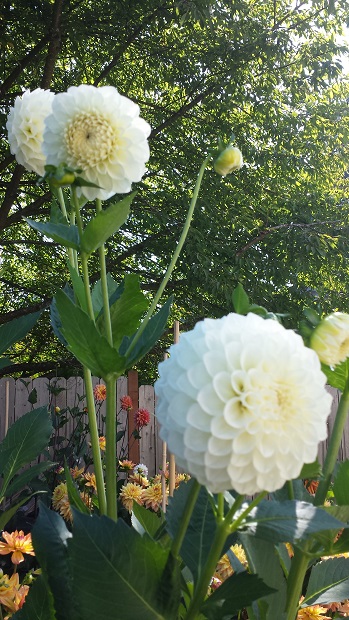
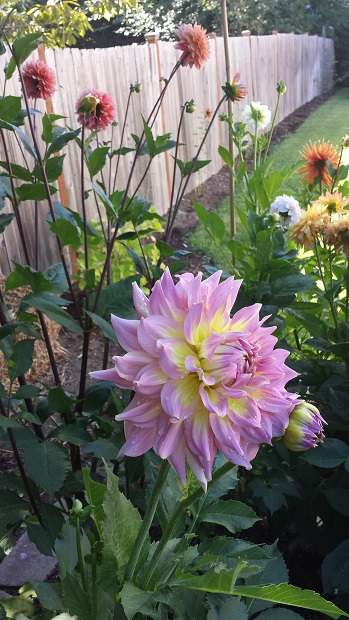
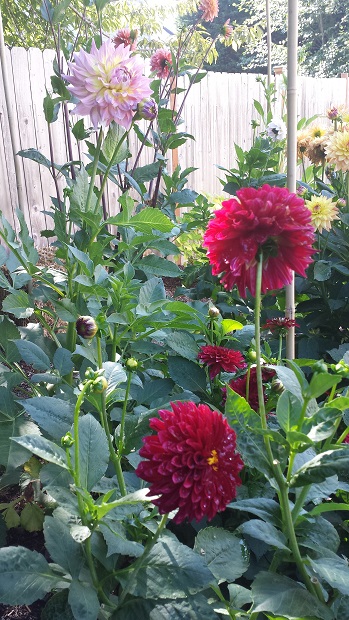
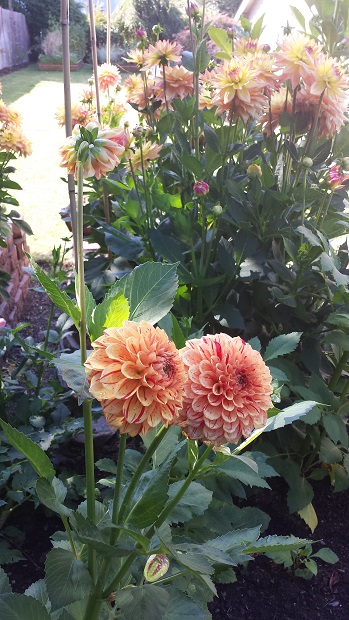
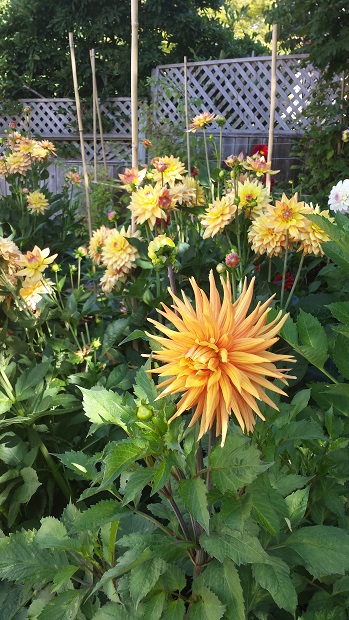
One of Leroy’s biggest reasons for making this garden was to grow the flowers for his wedding, I consider it a success.
Here are some photos from the project. The size of these flowers range from 5′ to 8′ across…They are huge.
I have to say that I really enjoy the ability to walk to the center of this garden. It’s a fun place to chill and relax, and I often just go read in the middle of it.
In hindsight, I probably would have made the center area slightly bigger, it’s a tight fit in there. I’d like to do it with another 12″ to move around, or put a bigger chair inside it.

Thank-you for sharing Leroyj!


